|
Map Light and Switch Refurbishment and Repair
Swapping out the halogen dome light with LEDs inspired me to replace the halogen map lights with LEDs and refurbish the switches.
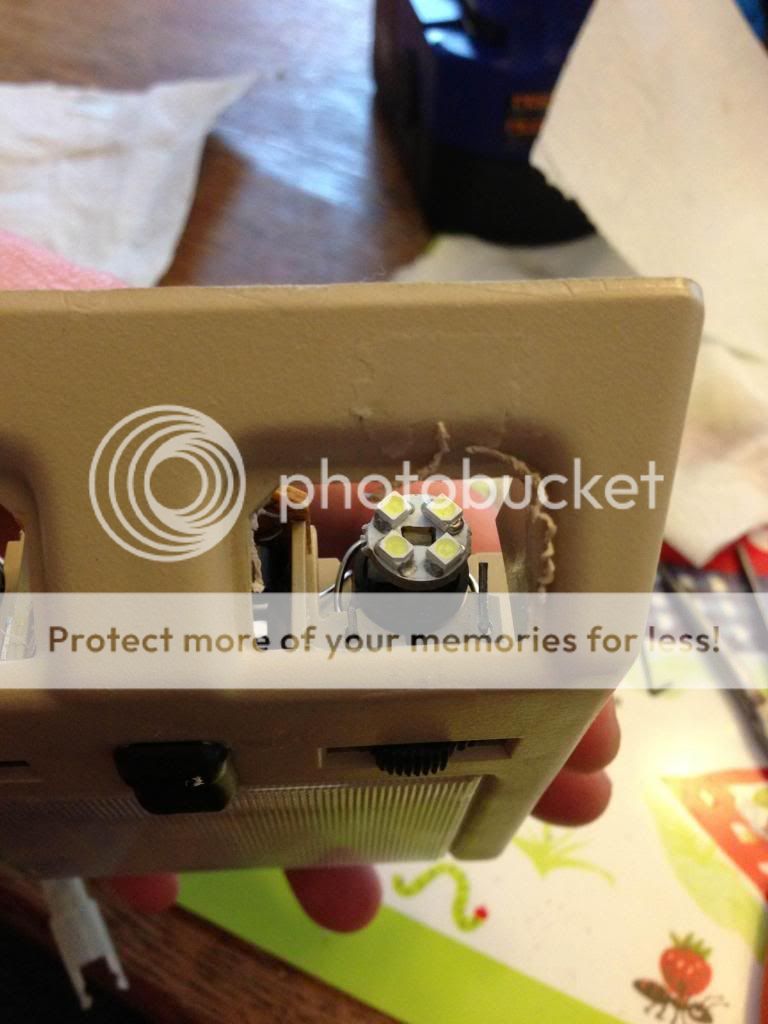
To upgrade the map light, I used the following 194/T10 wedge bulbs: http://www.amazon.com/gp/product/B002JSFH3G/ref=oh_details_o03_s00_i00
These were purchased because I thought I would want unidirectional lighting in the map lights. I would use a different LED bulb that provides 360 degrees of output if I did it again. The bulbs I installed don't cast less light down than I thought, and I may replace in due course with something like this: http://www.amazon.com/Jtech-5-SMD-White-Power-Lights/dp/B00877SL2M/ref=sr_1_6?s=automotive&ie=UTF8&qid=1360177513&sr=1-6&keywords=194+t10+led
The bulbs are a commodity product so I'd just buy the cheapest available from a reputable seller that has good reviews.
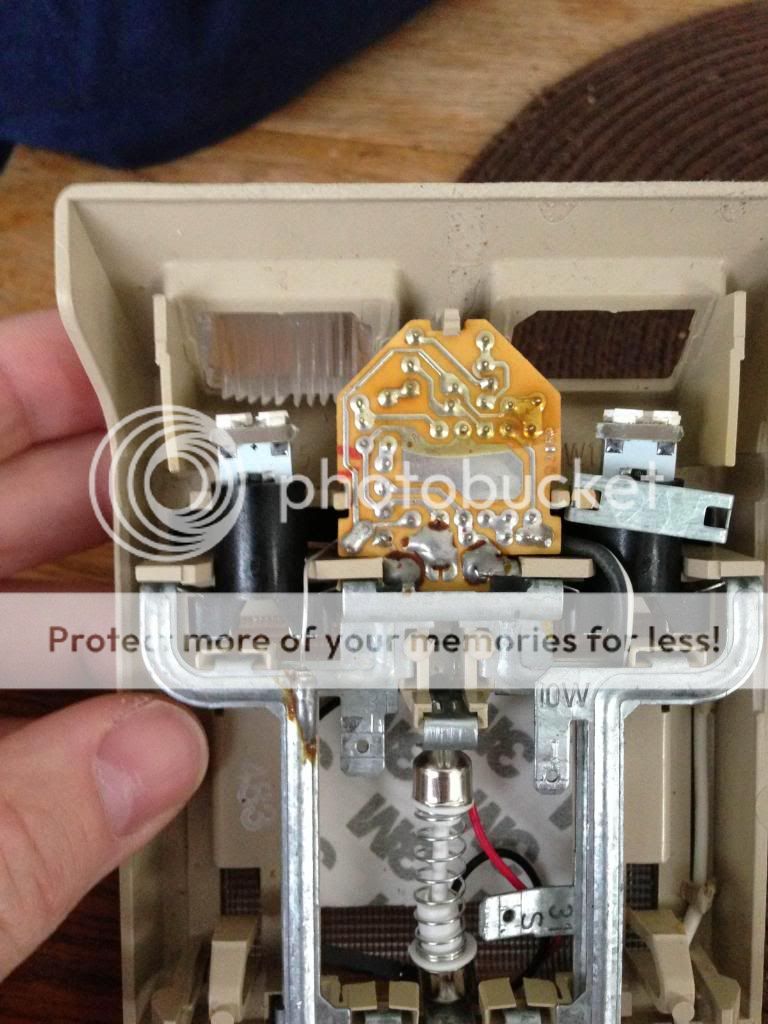
Also, my map light switches were pushed up into the body of the dome light and inoperable. Originally, the map light switch was held in by a pot metal bracket somehow attached to plastic posts that allegedly would keep the switch in place when someone pushed on it. The switch is a 3 position switch that rotates side to side, but people naturally press up to get friction on the switch to rotate side to side so the map light switch needs to be held in place on the vertical axis.
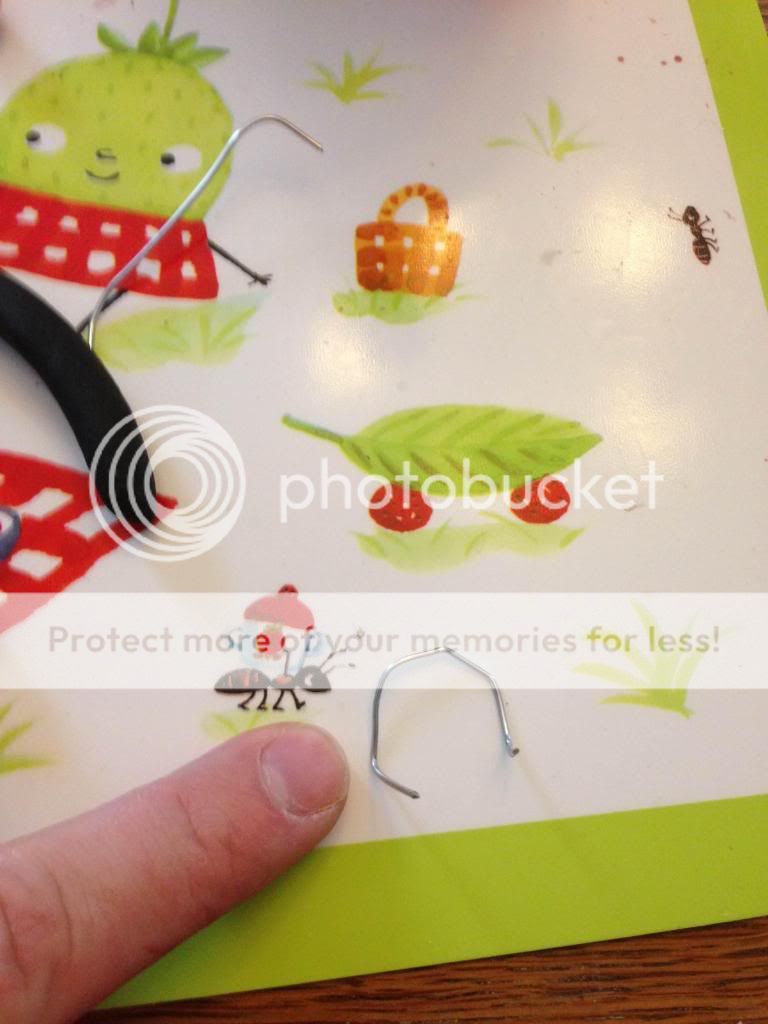
After mulling some options (over a few beers), I decided forming a band out of a thick paperclip to hold the map light socket in place secured by drilling some holes in the plastic body would be the simplest solution. If things didn't work, I could also easily remove the brackets without damage to other components. Any repair would have to allow the map light switch to rotate and not interfere with the contacts at the back of the socket. I figured free-forming something out of a paperclip would give me the adjust-ability I needed rather than trying to re-glue or re-attach missing parts.
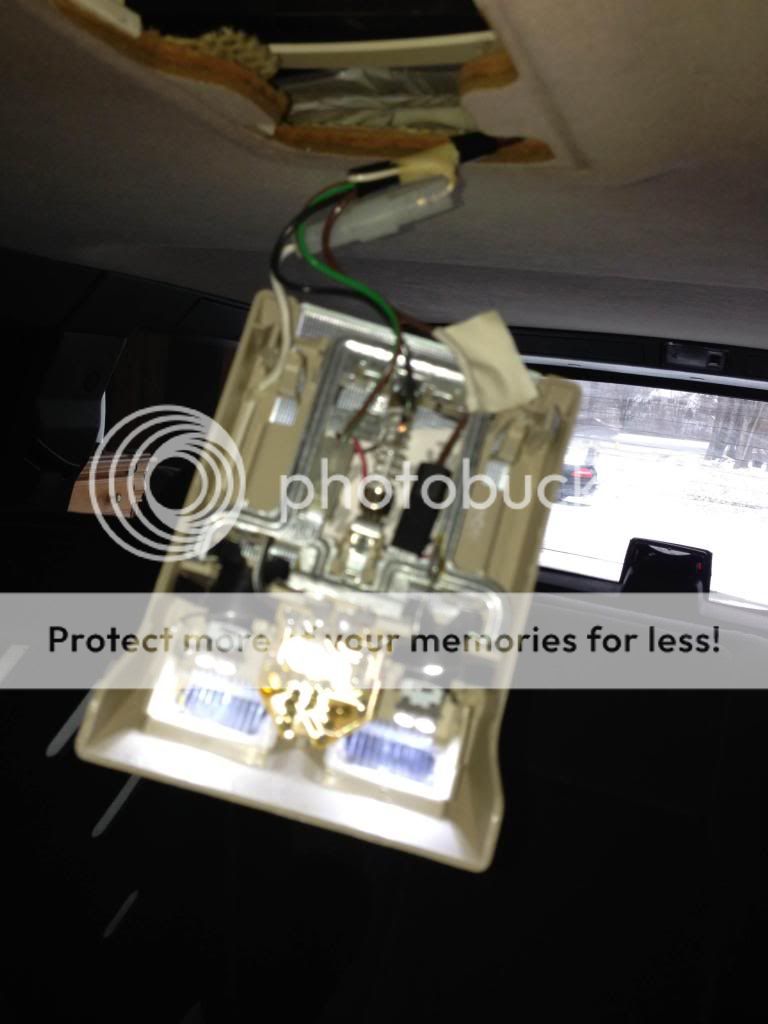
The interior of my dome light was pretty rough. One map light was missing an upright to support the original metal bracket, and the other was broken off on both sides. (see photo).
After using some pliers to make a rough pass at forming the paperclip brackets (photo below), I seated the map lights and bent the paperclip to fit using a pair of small needle nose pliers and trimmed off excess wire with a pair of snips. Also, one of the map light lenses that had been glued in fell out. I cleaned it up and used scotch tape for the time being to hold it in place (I didn't want to lock anything in yet in the event I need to replace). The map light lenses will fall out if any of the 4 original clips are broken, so be careful if you're taking them off.
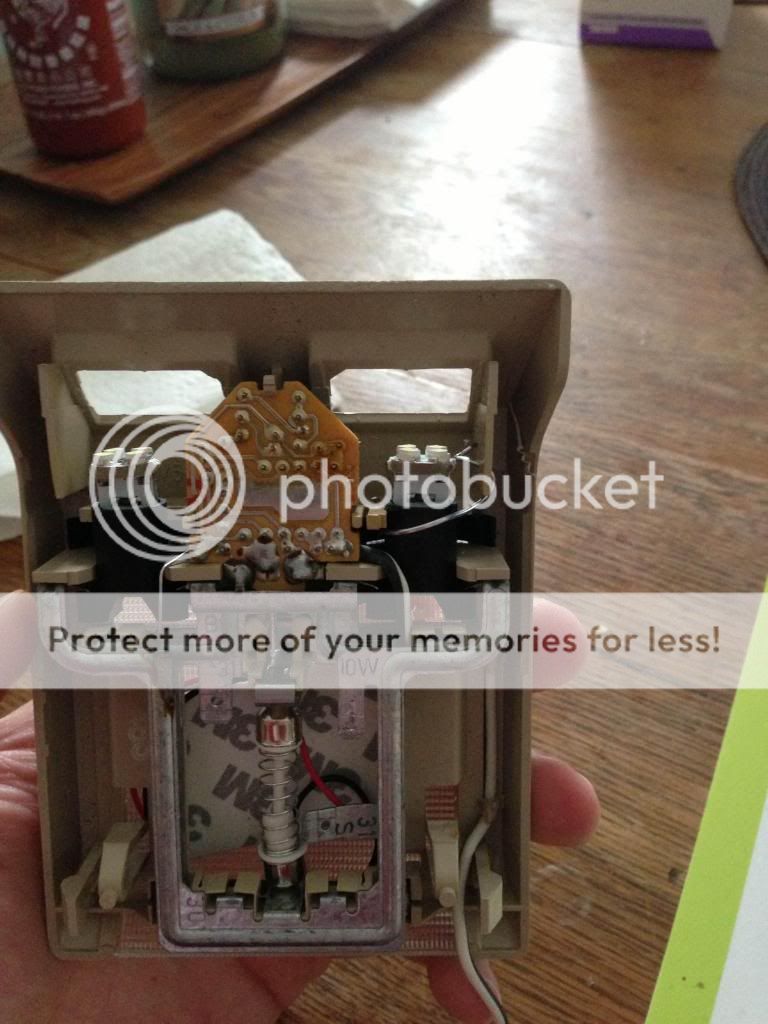
Given the state of the light, I had to take two approaches to drilling and forming the bracket for each side of the light. An installed paperclip bracket is in the photo below.
If you follow this method, you must be careful to ensure that the map light switch can rotate freely after any bracket is installed. I had to go to plan B once I a bracket installed because of interference from the switch, which entailed drilling a hole in a different part of the light (this is the light with the pigtail on the end of the paperclip).
So far, the map light switches have been working fine. The LEDs I used are an improvement over the halogen bulbs, but I may replace in due time to get more light cast down. Regardless, the dome light now throws off much more light than it did using halogen bulbs and probably puts less strain on the electrical system.
DISCLAIMER: Please remember to disconnect the power before removing the dome light (battery or #5 fuse), you do this at your own risk, and these instructions are a guide only and not in any way represented to be complete, safe, or accurate.
|


