|
Last week I posted asking for a measurement of the distance between the front frame horns on a 240. I had acquired a 1993 wagon that had been hit on the extreme front edge of the bumper on the passenger's side. With the measurement I was able to determine that the horns had moved together and it appeared to be pushed about 1 3/4”.

I had visions of saving the car and not simply parting it out. I decided it was not feasible to have a frame shop do the work as the cost would make the total repair cost exceed the value of the car. I pulled the car into the work space this morning and proceeded with a plan I came up with over the last several days.
I removed the wheel and placed a 4x4 on the frame rail at the cross member's location on the passenger's side. While the car was on a floor jack it was easy to push it so that other end was against a 2x10 that was against the wall. The 4x4 was supported with a piece of 2x4 screwed in between two framing members in the workspace (3 CD cases provided the necessary shim stock) and adjusted to be perpendicular to the wall.
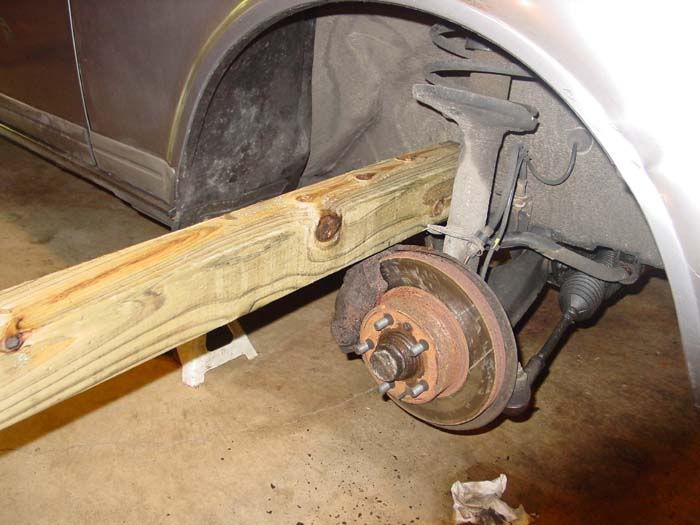

On the driver's side I placed a 4x4 as far forward as possible on the frame horn. To position the 4x4 I needed to remove the fender.

The other end of 4x4 was positioned with my floor jack against the wall at the height necessary to make the 4x4 level and adjusted to be perpendicular to the wall.

This arrangement of 4x4's provided the offset I felt I needed to apply the force in a way to move things back towards their original position.
At the rear on the driver's side I positioned pieces to prevent the car from moving when I applied the force with the floor jack

After I had the front of the car on jack stands I realized that the front frame horns were not equal distances from the floor. As best I could determine with a four foot level and measuring tape the driver's frame horn was pushed down about 2 inches.
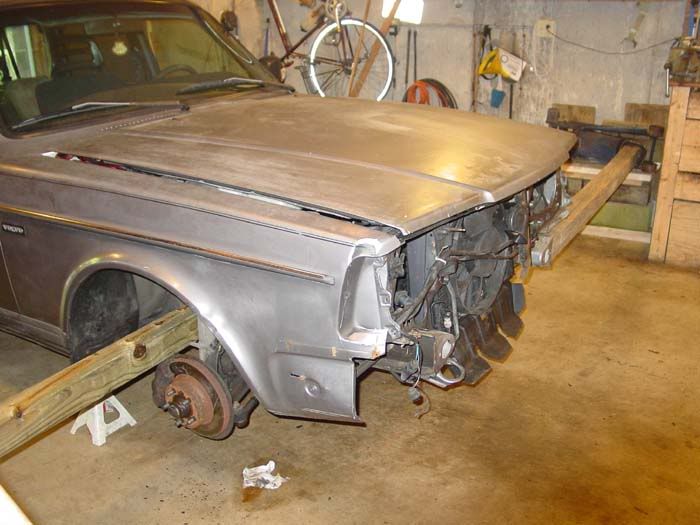
As I applied force with the jack things had little choice but to move. I knew that when I reached a point where things appeared to be in the correct position it would spring back once the jack was released- and it did; about 3/4”. A series of gradual moves and checks finally brought it to a position where once I removed the jack the hood lined up with the remaining fender.
I was happy and surprised to find that the driver's frame horn was also “lifted” back to a position to be the same height as the passenger's.
I realize the frame most likely is still out of alignment and it still may not be any more than a parts car after my efforts, but I won't know until I eventually get it in for alignment. The whole process took a little over two hours at a leisurely pace and the cost was zero dollars with all the materials on hand.
Randy
|


