|
A quick recap of reassembly and adjustment for anyone unlucky enough to even need the information.
Front bottom left to right:
-Cleaned valve body, new screens, oil tubes
-Front band servo, servo strut, and tubes
-Rear band servo, servo strut, and tubes
-Cleaned and painted transmission oil pan with new gasket
-Petroleum Jelly
-Laptop with service manual for reference

The front and rear servos get bolted in place in first. I don't think order matters, but I did the rear one before the front. One of the more difficult assembly steps is getting the servo struts to stay in place long enough to the the servo bolted down to hold them in. The petroleum jelly is the key here: a good dollop of the stuff will stick them in place long enough to get things tightened down. Sounds like a shadetree tactic, but it's what is in the green book.

Next is the front band servo adjustment. The green book says to use a special spacer to set gap on the front servo adjustment, which of course I don't have. Some online sources say the proper gap is .25", others say 6mm, but the difference there works out to be only .35 millimeters. I used a 1/4" hex key as a spacer to set the gap. Just back off the locknut, screw the adjuster in or out until the hex key drags slightly in the gap, then snug the locknut back up.

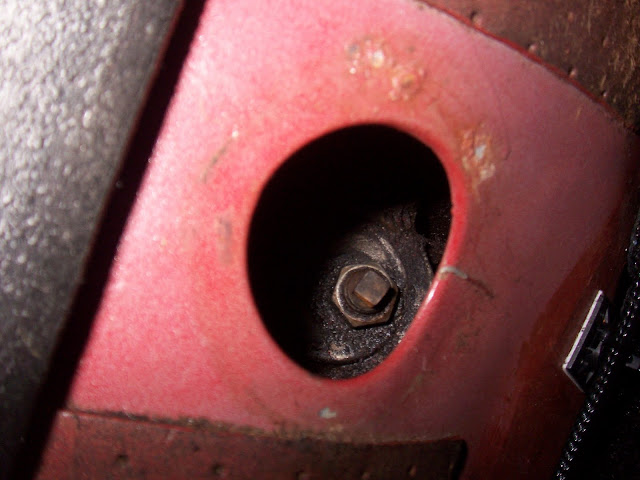
The rear band is adjusted from inside the car. There is a large rubber plug on the passenger side of the tunnel. Removing it gives access to the locknut and adjuster for the rear band. The green book reccomends the following adjustment procedure: back off locknut, tighter adjuster to 10 ft-lbs with a torque wrench, then BACK OFF the adjuster .75-1.0 turns, then snug the locknut back up.

The valve body bolts up next (3 bolts, two in the rearward screen, one in the middle of the body portion). Make sure the pump tubes fully seat, and make sure the big one has it's o-ring on it.


Make sure to line up the gear selection piston with the shift linkage while tightening the body down.

Reconnect your throttle valve cable. I actually couldn't get the cable end free of the pulley during the tear down, so I unscrewed the entire cam bracket from the valve body when I removed it, and just let the cam and bracket hang from the cable while I dismantled the valve body. There is obviously a lot of slack in the cable as shown below. I tried to get some of it out by making the outer cable sleeve longer, using the bracket near the carb. It still seems too long though, and does not "snap back" cleanly when you actuate the carb linkage.

Refit the 4 servo and clutch tubes. The rear clutch tube has to go quite a ways up into the innards to bottom out. You should sort of feel the tubes "click" into place when they are fully seated.

Reinstall the pan with gasket and the gear selection stop that prevents overshifting. PUT THE DRAIN PLUG BACK IN. Fill with Type F ATF. The manual states about 6.5 quarts to fill the thing up, but I'm guessing that's if you manage to drain the clutches as well. I added six quarts, which was probably a little bit too much. Run the car until it is up to temp, and slowly shift through the gears with the wheels chocked and emergency brake on. It will take awhile of letting the car sit in each gear to move fluid into all the nooks and crannies, and flush the air out. I could definitely feel the RPM's surging occasionally, or getting a very delayed shift, for a good 5-10 minutes of idling and going through the gears, but it seemed to level out eventually as air was forced through the system.
|