|
Several times I've wrestled with the donut hangers for the first muffler, and never got them properly installed till yesterday. The hangers mightily resist your efforts to stretch them to hook them over the brackets. Photos below show how I got them in.
A mechanic friend of mine uses a different method - a very large pair of pliers to pull the muffler into position so the hanger can be popped into place. The method below worked for me with the tools I had available.
First photo shows the left side brackets after right side mount was installed, with tension rope in place. Without tension the gap is much wider. Note the fat, stretch resistant mount.
Second photo shows rope anchored to front of rear trailing arm. Wood stick tightens rope and is tied down to lock.
Third photo shows similar rope anchored to rear sway bar with wrench stuck into rope to tighten. Forward end of that rope is looped through the bracket base at front top of muffler.
I used a similar setup on the rear muffler to pull it over sideways so I could get the second mount in place.
Other times I've used one old donut mount. These are a lot stretchier and will go into place. But they fail early without telling you, causing the pipe system to hang crooked and probably fail early.
First, hang both mufflers. Then assemble the pipes to the mufflers with clamps on loose. Sliding both pipes fully onto the first muffler will likely give you an overall length that's too short, pulling on the second muffler. Pay attention to where and how they hang before attaching pipes so you can approximate that.
A 3 lb. hammer is good for driving the 2nd muffler off the cat converter pipe and for adjusting the position of the new one.
--
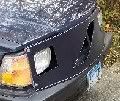
Sven: '89 245 NA, 951 ECU, expanded air dam, forward belly pan reaches oem belly pan, airbox heater upgraded, E-fan, 205/65-15 at 50 psi, IPD sways, no a/c-p/s belt, E-Codes, amber front corner reflectors, aero front face, quad horns, tach, small clock.

|