Click on the picture image to send the IMAGE URL back to the referring screen.
Display by picture type:
[
CARS(default)]
[
PERSONAL]
[
TECHNICAL]
[
CLASSAD]
[
STANDBYV]
|
Welcome to the gallery. All exhibits are volunteered by users.
There are 14003 total exhibits.
|
|
[ADD A NEW EXHIBIT]
|
|---|
Search criteria: pix_type=TECHNICAL. [
CLEAR]
Showing 2181 through 2200 of 14003 matching exhibits.
<< <prev 105 106 107 108 109 110 111 112 113 114 115 116 117 118 119 120 121 122 123 124 125 next> >>
|
|
|
| POSTED BY |
| spasske[SHOW ALL] |
| DATE |
|
| HTML |
|
| CITY |
| Highland |
| STATE |
| IN |
| COUNTRY |
| US |
| NOTE |
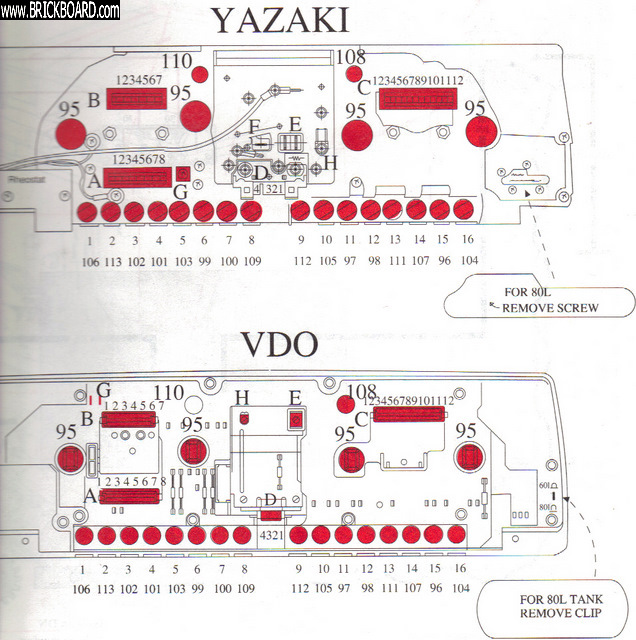
| This is the backview of the clusters |
|
|
|
|
|
|
|
| POSTED BY |
| spasske[SHOW ALL] |
| DATE |
|
| HTML |
|
| CITY |
| Highland |
| STATE |
| IN |
| COUNTRY |
| US |
| NOTE |
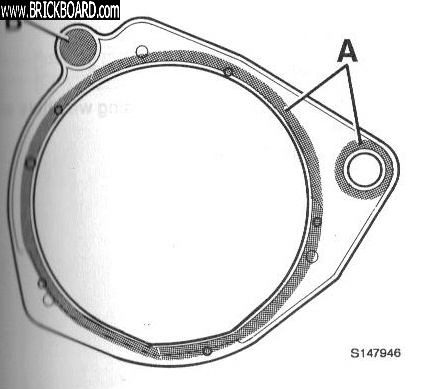
| Blower motor adapter plate. |
|
|
|
|
|
|

|
| POSTED BY |
| Keith756W[SHOW ALL] |
| DATE |
|
| HTML |
|
| CITY |
| MIlan |
| STATE |
| IL |
| COUNTRY |
| US |
| NOTE |
| hood from 1965 544 on Keith W. 444 project |
|
|
|
|
|
|
|
| POSTED BY |
| volvobub[SHOW ALL] |
| DATE |
|
| HTML |
|
| CITY |
| Watsonville |
| STATE |
| CA |
| COUNTRY |
| US |
| NOTE |
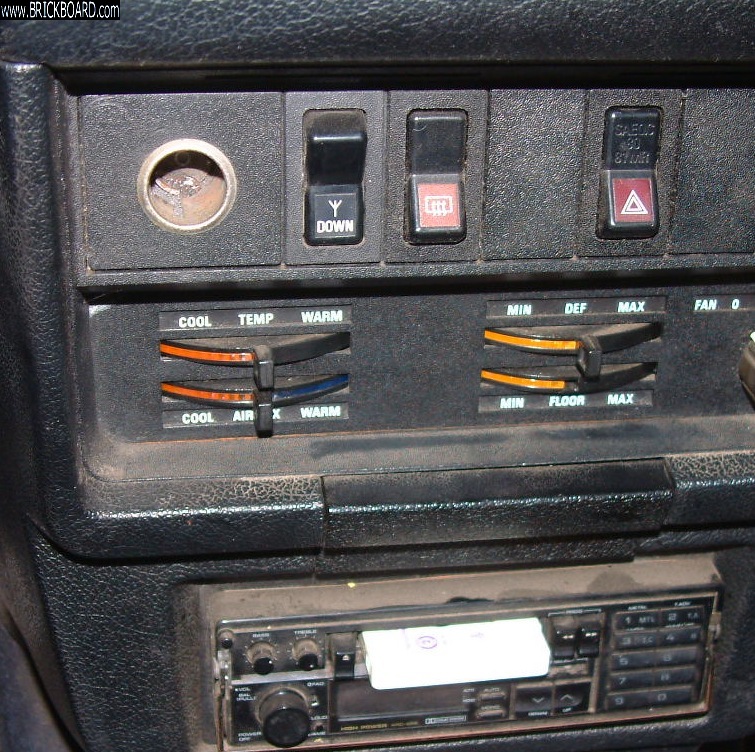
| Heater Controls in My grey market 245 Turbo |
|
|
|
|
|
|
|
| POSTED BY |
| Thom[SHOW ALL] |
| DATE |
|
| HTML |
|
| STATE |
| CT |
| COUNTRY |
| US |
| NOTE |
| Not sure if the black wire goes to "A" or "B" |
|
|
|
|
|
|
|
| POSTED BY |
| chuffsy[SHOW ALL] |
| DATE |
|
| HTML |
|
| CITY |
| Miami |
| STATE |
| FL |
| COUNTRY |
| US |
| NOTE |
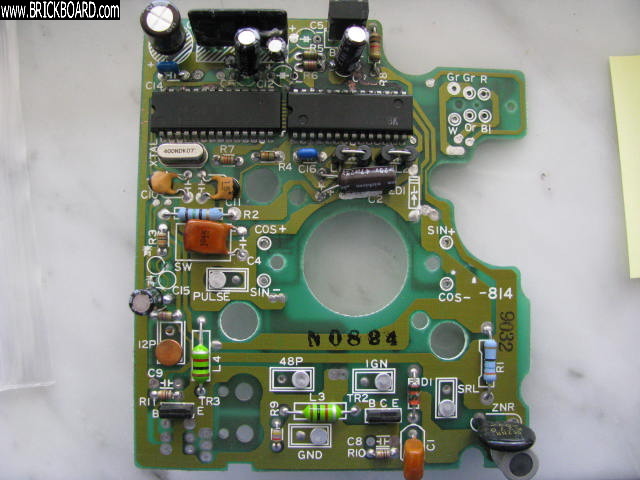
| Here is the speedo circuit board with new capacitors installed |
|
|
|
|
|
|
|
| POSTED BY |
| chuffsy[SHOW ALL] |
| DATE |
|
| HTML |
|
| CITY |
| Miami |
| STATE |
| FL |
| COUNTRY |
| US |
| NOTE |
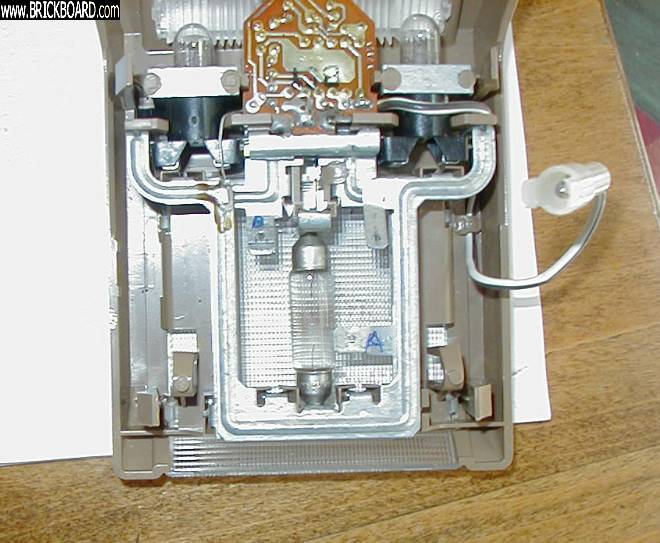
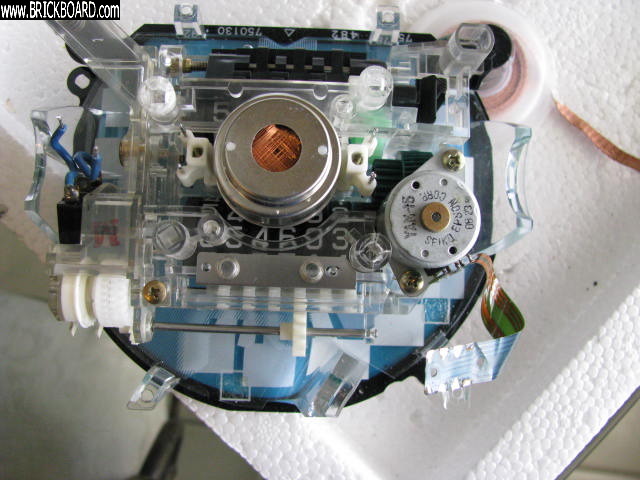
| This is what it looks like when the speedo circuit board is separated from the mechanical part. There is a detailed procedure for the speedo repair in the FAQs 700/900 |
|
|
|
|
|
|

|
| POSTED BY |
| chuffsy[SHOW ALL] |
| DATE |
|
| HTML |
|
| CITY |
| Miami |
| STATE |
| FL |
| COUNTRY |
| US |
| NOTE |
| Here is the circuit board from the speedo showing six new electrolytic capacitors |
|
|
|
|
|
|
|
| POSTED BY |
| Thom[SHOW ALL] |
| DATE |
|
| HTML |
|
| STATE |
| CT |
| COUNTRY |
| US |
| NOTE |
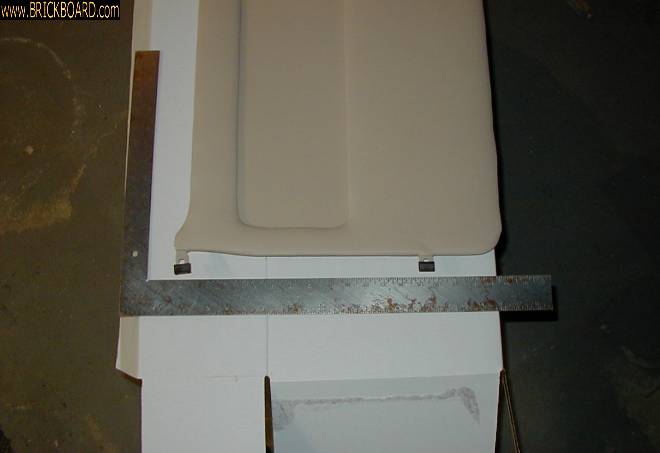
| Note how the rear glide is askew compared to the front glide. |
|
|
|
|
|
|

|
| POSTED BY |
| chuffsy[SHOW ALL] |
| DATE |
|
| HTML |
|
| CITY |
| Miami |
| STATE |
| FL |
| COUNTRY |
| US |
| NOTE |
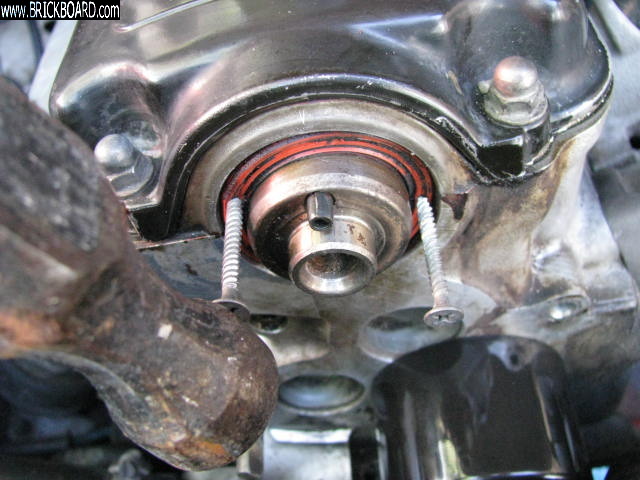
| Camshaft with seal removed |
|
|
|
|
|
|
|
| POSTED BY |
| chuffsy[SHOW ALL] |
| DATE |
|
| HTML |
|
| CITY |
| Miami |
| STATE |
| FL |
| COUNTRY |
| US |
| NOTE |
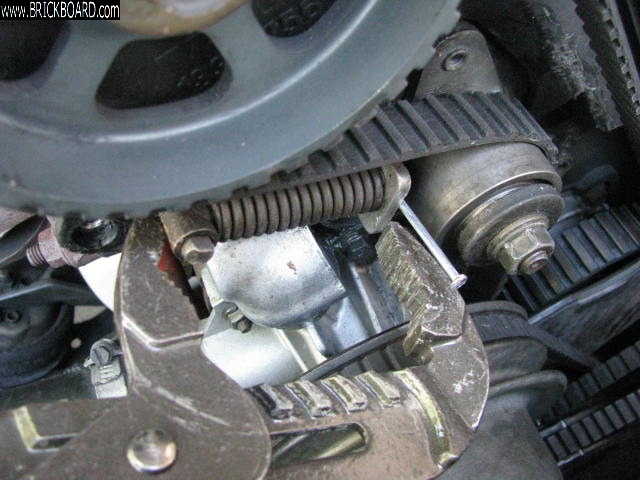
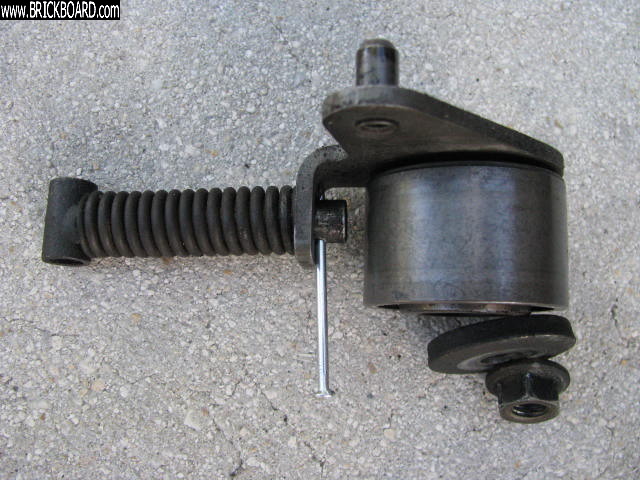
| Here I am using a channel lock to squeeze the spring on the timing belt tensioner so that I can insert a nail in the little hole to release the tension from the belt |
|
|
|
|
|
|
|
| POSTED BY |
| chuffsy[SHOW ALL] |
| DATE |
|
| HTML |
|
| CITY |
| Miami |
| STATE |
| FL |
| COUNTRY |
| US |
| NOTE |
| Here is a pic of the timing belt tensioner. Note the nail that was inserted in the little hole to hold the spring back to facilitate belt removal and installation. The bolt that secures this should be torqued to 37 ft/lbs after reinstallation |
|
|
|
|
|
|
|
| POSTED BY |
| chuffsy[SHOW ALL] |
| DATE |
|
| HTML |
|
| CITY |
| Miami |
| STATE |
| FL |
| COUNTRY |
| US |
| NOTE |
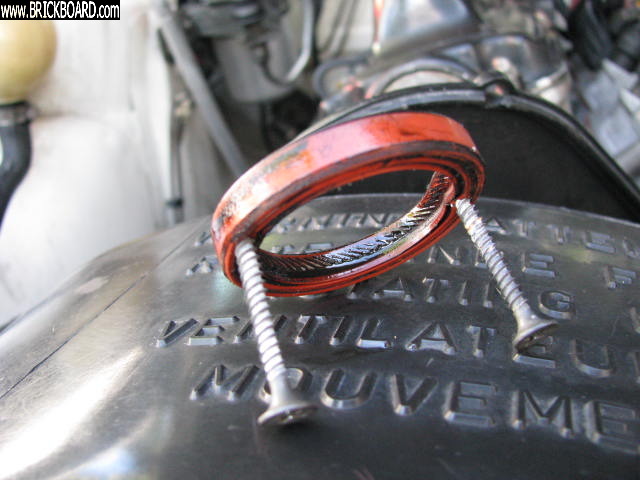
| This is the cam seal after removal showing the dry wall screws that I used. I used my fingers in this case evn though you could try pliers |
|
|
|
|
|
|
|
| POSTED BY |
| chuffsy[SHOW ALL] |
| DATE |
|
| HTML |
|
| CITY |
| Miami |
| STATE |
| FL |
| COUNTRY |
| US |
| NOTE |
| To remove the cam seal I used two DRY WALL screws. I tapped them in with a hammer just enough so I could use a screw driver to get them in further. You dont have to go in a lot just so you can hold them and pull the seal out. To give you an idea the tip of the screws were not protruding out of the other side. |
|
|
|
|
Search criteria: pix_type=TECHNICAL. [
CLEAR]
Showing 2181 through 2200 of 14003 matching exhibits.
<< <prev 105 106 107 108 109 110 111 112 113 114 115 116 117 118 119 120 121 122 123 124 125 next> >>
©Jarrod Stenberg 1997-2022. All material except where indicated.
Brickboard.com is not affiliated with nor sponsored by AB Volvo, Volvo Car Corporation, Volvo Cars of North America, Inc. or Ford Motor Company. Brickboard.com is a Volvo owner/enthusiast site, similar to a club, and does not intend to pose as an official Volvo site. The official Volvo site can be found here.
;)
;)
;)
;)
;)
;)
;)
;)
;)
;)
;)
;)
;)
;)
;)
;)
;)
;)
;)
;)