|
|
|
My 1980 242 DL M45 manual transmission with 143k+ miles on a broken odometer has a lot of oil at the top of the water pump and below the top water pump o-ring seal and the upper water pump o-ring seal is swollen and visibly extends well outside of it fitting. However, pressure testing the coolant doesn't show leaks.
Nevertheless, I'm going to change the water pump and the timing belt along with all of the oil seals and timing belt tensioner.
However, I've never done a timing belt on this car, though I've done them in the past on my B230F engine Volvos.
The brickboard FAQs
https://www.brickboard.com/FAQ/700-900/EngineSealsBeltsVent.htm#Changing_Timing_Belt_Bolt_Removal
indicate that the rounded tooth timing belts (1994-1995s) last 100k, whereas the square tooth (like my 1980) last only 50k. If I install rounded junkyard cam, intermediate, and crankshaft sprockets from a later B230F engine and a rounded tooth timing belt, would that setup work in my 1980?
I notice that the fan has a large, central bolt instead of the 4 studs that connect the fan to the water pump as in the later model 240s. Do I merely use an impact drill to remove and later reinstall the fan?
Finally, Bentley, p. 215-3 is unclear. It accurately depicts my crankshaft pulley as having six smaller bolts surrounding a larger bolt (24 mm per my measurement).
The crankshaft pulley looks like this:
https://encrypted-tbn0.gstatic.com/images?q=tbn:ANd9GcSjeCOYlIgG4aPKCW9LiXJsp9fWf_Wv7vf20ge2ooIRJRZYoNZZdg
I want to change the crankshaft oil seal. Bentley says to remove the 6 smaller bolts to remove the crankshaft pulley. I get that so far. What I don't get is how to remove and correctly torque on reinstall the camshaft bolt. I have the IPD tool 5284
https://images-na.ssl-images-amazon.com/images/I/81XVD5UE57L._AC_UL160_SR160,160_.jpg
that does a great job of holding the B230F harmonic balancers, but it won't work here, because the crankshaft pulley is solid and without the holes for the 5284 to fit into.
Can I upgrade the B21F crankshaft pulley to a B230F harmonic balancer?
Thanks!
|
|
-
|
|
|
I am unable to tighten my 1980 242 DL's 22mm crankshaft bolt to 122 ft-lbs. I removed two of the six 10mm bolts that hold the components of the crankshaft, then put a pulley holder into the two resulting holes, but it kept slipping.
I would use the rope trick (which worked to loosen the crankshaft bolt), but I can't find the timing mark notch on the crankshaft to get to 90 degrees BTDC. Although I know to rotate it so that the distributor points to the #1 spark plug wire, I am unsure whether I"m at TDC or 180 degrees off. If I'm 180 degrees off and use the rope trick, would I damage anything, particularly the valves?
Thanks
|
|
-
|
|
|
Hi,
The crankshaft has a keyway cut into the outer diameter that the belt sprocket fits on to.
The keyway will align with an aluminum rib casted into front of the engine just behind the sprocket.
This will put the number one piston at the TDC everytime it makes one revolution. It's just that simple.
Now this is where the cam comes in. It decides whether you are on going onto a power stroke or ending an exhaust stroke. The valves will be closed in both positions.
The cams lobes that are over the front cylinder will not be pointing down and pressing on the valves shim buckets.
Just like on the crankshaft there is a dot on the camshaft sprocket that will appear at the top and align with the mark at the top on the engine.
Mechanically speaking it is doing the same thing over and over every revolution!
It the locating of the ignition distributor, firing at or on number one, that decides the firing positions throughout the running of the engine.
I torque the bolt to 45 foot pounds and then hit it with an air impact wrench until it moves almost one flat farther around. I say almost because, if I can't get it to that point, I then figure that the impact has quit moving it, it has gotten it tight enough! You definitely don't want to move it any farther than that one the flat. So for me, it's a safety limit not to over stress the bolt!
Using the rope trick won't hurt anything as long as the cam lobes are pointing up in what ever cylinder you want to use.
Phil
|
|
-
|
|
|
Thanks, Phil.
Just to be clear, I'm talking about a 1980 B21F engine, which calls for 122 ft-lbs of torque. Do you mean that you first torque a B21F to 45 ft-lbs, then use an impact drill?
If so, would you clarify for me the end point of using an impact drill, i.e. "until it moves almost one flat farther around"?
Thanks
|
|
-
|
|
|
Hi,
I thought I was pretty clear to you how to get the bolt tight but I have a little extra time so I can tell you more about the reasoning I use to get to the approximate value they are calling for.
Yes that is the method I use on all my cars.
The bolt is the same in all the crankshafts even though the pulleys change from being a solid one to a split one with shims used to adjust the belt for the A/C. That's why you have six bolts.
Later the setup changed to a rubberized damper keyed to the belt sprocket only and a big washer to sandwich everything.
The torque values for either method works out to be the same to hold that belt sprocket in place.
Yes, its a lot of torque and is why you must get everything under it (belt guides) flat and straight or you can break the thin sprocket.
The method for turning, after preloading, works for most people who don't have a 3/4" drive, 150 Foot Pound torque wrench hanging on a wall because its too large to fit into a tool box.
I personally would not buy one unless I did rear end differential work.
I know this, because I inherited one from a close neighbor who passed several years ago. He used it for crushing a pinion nut washer on his Dodge truck. I don't think he ever used it again.
The impact driver works the best on the manual transmissions with the parking brake set or having the car on the ground and in gear.
Now that I have one car with an automatic, but have not needed to change a timing belt, as of yet.
That day will be as interesting as yours on the need to lock it that engine up.
You can reach that amount of torque with a half inch drive torque wrench. But it's not nice!
It's actually not very good for the torque wrench to use it at its extreme.
When it's used at the most upmost end of its range, it will not maintain its accuracy for being pushed to its limit.
A clicker wrench is more susceptible to stress because of the spring arrangement inside.
An old steel beam one can get bent and it still will work. All you is reset the needle arm back over the zero on the scale.
Trouble is but it's very hard to read the scale sideways when pulling hard with such a short length and the click is a nicer feature. I keep my beam one to check calibration of my clickers!
Torque wrenches are like pressure gauges and are meant to be installed where the gauge operates the majority of its time in the middle of its total range.
You would not install a 100 pound gauge to measure 15 psi or less system. If you wanted to read any small variances say around 10 psi it won't be as accurate as a 30 psi gauge.
The gauges themselves are calibrated to be "spot on" in their mid range to begin with.
The +/- tolerance accuracy is specified as its mid range of usage.
I use a 3/8" clicker to do spark plugs, drain plugs and so forth. This is because it fits in tighter places and their extensions and such are lighter.
I know if you read the Bently manual, they have a misprint of it saying 90 degrees, when it should say 60 degrees.
The hex head on the bolt has six flats. Divide 360 degrees that it takes to make a circle by six and you automatically get sixty degrees or rotation.
This make more sense if you think about it for mechanics to get the angle correctly without special tools!
In all cases of tightening, you are stretching an area of the body mass between threads and the top of the head. Preloading a certain amount stress is to remove looseness and provide tension or a starting point. The whole idea is tension against vibrational forces and rotational forces.
So on engines the idea of not using a torque wrench is ludicrous and so it is why, you have specifications written for specific areas.
On other things, like engine accessories, using brackets and alike you don't get anything specific but you learn quickly that too much or not enough can bring you grief!
You learn what "tight is" from experience!
Take a wheel nut for an example, that gets tightened to 80 foot pounds. That's a lot of torque in reality but who wants to have any to come loose?
How many of those get stripped or studs broken by the tire shops? That scares me somewhat, but apparently, that area is overly engineered to help get a better outcome, considering the motoring public options of servicing wheels and tires.
There are four nuts on light weight economy cars or five and up on heavier vehicles. Weight and larger diameters increase the forces the wheel can be subjected too! The more is better and at a point they get larger studs and nuts like on 18 wheelers.
The call out is of 122 for only one bolt and it can be done this way. First of all the bolt has a lot more bulk than the wheel studs do.
The diameter down there being held together is a lot smaller, it has nice snug fitting parts, if compared to a wheel rim and the joint is keyed to be driven by the key, so where can it go?
If you get it tight, as in even close, to the specifications called out, its not going to go anywhere.
Remember the 45 ft lbs. is a setting of preloading.
The engineering behind this is wanting almost three times that as a final torque value, of which I think, is a bit much for this joint. It is what it is though!
I'm not a rocket scientist, so I try to live within my means and/or tools and justly getting it close with the use of a tool that I know can tighten stuff up really tightly.
A half-inch impact and a half-inch torque wrench are made to be rather equal in their capabilities of work assigned for them to perform.
Do the best you can, it will come out all right!
As my point being is that somethings are just overly engineered, for safety to cover their buns, over the actual purpose.
This is only a good thing considering the general public and the way it is today!
Phil
|
|
-
|
|
|
"but I have a little extra time"
Huh? A little extra time! Wow, you must be a maniac at the keyboard. What's your typing speed? Thought speed? Hey, I'm impressed.
--
1980 245 Canadian B21A with SU carb, M46 trans, 3:31 dif, in Brampton, Ont.
|
|
-

|
|
1908242DLa,
Oh my.
No go. 1992-1993+ round tooth timing belt gear cog may not fit on 1980 240 B21F crankshaft. Will fit for cam t-belt cog gear pulleys.
The crankshaft to t-belt crank pulley cog, so far as I know, won't fit the front of the not so low friction B21 crankshaft nose or snout(?). (You can certainly try and please prove me wrong.) Can't swap the low friction (B230) Redblock crank pulley with not so high friction (B21) redblock, tho.
Correct pulley:

Volvo low friction four cylinder redblock crank pulley counter hold (that may not fit in new low friction pulley like on my 1991) your replacement low friction engine crank pulley does not work on not so low friction crank pulley like your B21.
No.

There is not an upgrade from the not so low friction redblock like your B21 to a B21 being able to use the B230 harmonic oscillator balancer pulley. The crank pulleys are different as the crankshaft is different. You have a drop-forged alloy (if I recall correctly) crank shaft. Low friction (like your 1988 [?] B230 240) has a cast alloy crankshaft with more counter weights and smaller bearing journal diameters. The low friction crank shaft pulley has the rubber bushing and steel mass to dampen vibration, I guess, though the actual description is more complicated with cast crank shafts.
Gates I believe makes a Kevlar belt for square tooth. Though you still need to reset tension maybe once or twice yearly, lasts for 100k miles, if I recall correctly.
Nothing wrong with using ContiTech (Continental) OEM belt. Reset tension the first several hundred miles as they stretch. Though replace at 50 k. Reset tension during oil change.
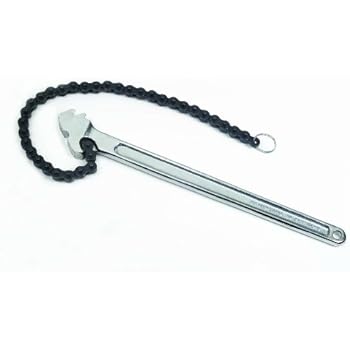
Here is my post I mention the tools you need for the cam counter hold and can also be used for the not so low friction B21 crank pulley counterhold Volvo PN 9995034:
https://www.brickboard.com/RWD/volvo/1480258/please_volvo_tools_front_crank_cam_seal_replacment_buy_rent_now.html

What I have. Though may not have used this on not so low friction B21 though I recall is is like that counter hold tool yet it had a handle on it. The 9995034 requires a 1/2" drive ratchet or breaker bar be used. Have to hold it steady for the rolled steal pin the t-belt cam pulley cog aligns to during bolt removal and torque.
I notice that the fan has a large, central bolt instead of the 4 studs that connect the fan to the water pump as in the later model 240s. Do I merely use an impact drill to remove and later reinstall the fan?
You do have the Bentley or (wrong power steering fluid specified, wrong front hub for 240 front hub bearing service, needs an errata as Uncle Art and Folks maintain for Bentley here) Haynes 240 service manual?
You should be able to see the small 10mm hex heads as you peer into the engine bay. You'd use a wrench. If not, use waterpump wrench as pulley counter hold, and remove the center nut to remove the fan from the clutch and engine to expose the four 10mm hardware.
No. The water pump pulley bell is where you place a counter hold, such a strap or chain wrench (some may use a large channel lock tho not as secure a grip as a chain or other 'waterpump' wrench. The assembly is a little different from your 1986+ 240. You may have the single unit all metal fan and clutch. The not so low friction engine crank pulley is low mass and does not dampen vibration. (Though just don't force the hardware during removal and replacement, don't bend the low mass crank pulley!)
Not so low-friction B21 uses six bolts. Low frictions uses five. To secure wasserpumpen.
http://cleanflametrap.com/wasserpumpen.html
http://forums.turbobricks.com/showthread.php?t=289693
Bentley Errata:
https://www.brickboard.com/RWD/volvo/1330795/220/240/260/280/bentley_errata_update.html
The bell of the pulley is between where trhe studs are and the actual pulley part you apply a water pump wrench counter hold to remove the four small bolts.
http://www.volvoadventures.com/240waterpumpnew.jpg
Image from:
http://www.volvoadventures.com/howtodowaterpump.html
However, the fan assembly flange secures to the water pump (a flanged interface) flange using the familiar four small bolt hardware or threaded studs into the water pump flange secured with nuts and washers and use a 10mm wrench. A hex headed box end or maybe quality non-chamfered line wrench (where the wrench is flat and makes full contact with the hex head bolt or hex nut - as there can be corrosion if a factory or very old waterpump install in a rust belt - engine oil leaks may prevent that - ha).
https://www.brickboard.com/FAQ/700-900/WaterPumpChange.htm
https://www.brickboard.com/FAQ/700-900/Cooling.htm
You will have to detach the two top retaining metal screws that secure the fan shroud to the radiator as your right arm will pass through the fan shroud. All the while you must not mar the radiator. Do not let the fan assembly, once detached from the water pump, to contact the radiator in any way (or straighten the fins if bent).
For waterpump install I use SuperLube synthetic silicon grease on the (use) Volvo brand gasket and seals. I've used two Hepu brand water pumps. I used one Volvo brand blue box pump and it started leaking after one year. Use distilled water when mixing up coolant. Inspect through the large lower radiator lower coolant return line port for blockage of the horizontal tube ends that may require radiator repair or replacement. 1980 came with a yellow alloy all-metal radiator.
Inspect the hot water coolant return line at the end corrosion.
Water pump install is not well mentioned or documented is the water pump lift to compress the top seal and install the remaining water pump hardware. Don't tear the gasket I won't use RTV unless the mounting surface is heavily corroded / pitted. I install the hardware through the oblong holes so it is loose, and lever up on the waterpump bottom when the water pump (you may have to hold toward the block) as you press it up so the round hole hardware slides in and threads easily. Don't want hardware dragging on the water pump material much as you thread in and eventually torque the water pump retaining hardware.
Please see the seal presses you want to use to install the seals. Volvo Penta may rent the tools to you. Or maybe the dealership?
I guess that does it. Over three hours? More tea?
No moar cGMP, oh Boyeeeeeee.
--
Give your brickboard.com a big thumbs up! Way up! - Roger Ebert.  
|
|
-
|
|
|
Thanks.
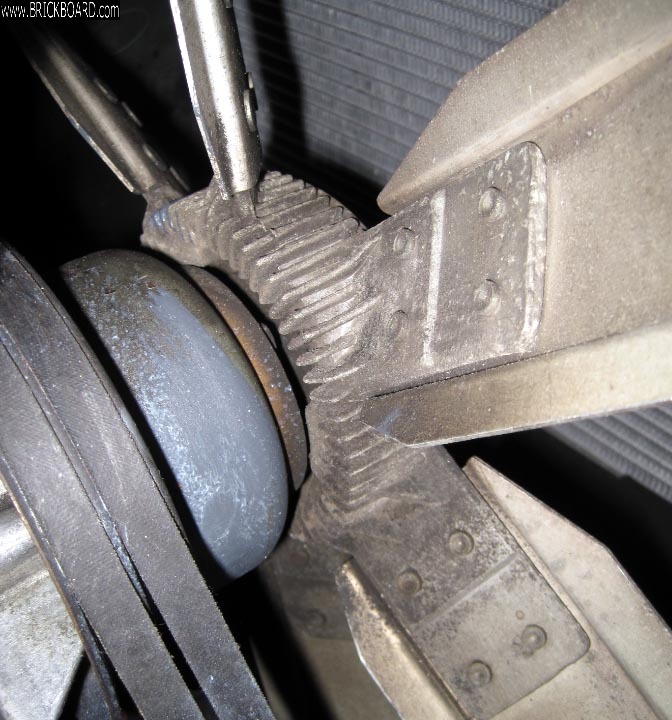
Here's a pic of the rear of the fan clutch and front of the water pump pulley set up for the 1980.
https://www.brickboard.com/GALLERY/volvopic.htm?js_link=&id=13338
I see the four water pump studs behind the fan clutch (one is clear in photo); however, unlike my 1988 Volvo, the fan cluth in the 1980 blocks me from inserting a 10 mm wrench to loosen those pulley studs.
|
|
-
|
|
|
That's very interesting. Never saw that on a 240. I drive a 1980 245. It looks like the sort of drive for 140 models with a clutch fan. Looks like you'll need to remove the radiator to get room to take that center bolt out of the clutch fan. Slide the fan off its drive mount and you should be able to get to the studs/nuts. -- Dave
|
|
-
posted by
someone claiming to be CB
on
Mon Dec 31 12:31 CST 2018 [ RELATED]
|
|
Dave, I had that setup on my 80 244. I still have the mount and the old fan/clutch around somewhere. When that clutch failed, I replaced it with a FlexFan with a custom aluminum spacer that IPD was selling a the time. That set up is way lighter that the Clutched fan. That was IPD's selling point, lighter less stress on the WP bearings.
Happy New Year.
|
|
-
|
|
|
Yep, a large nut at the center that secures the unified fan / clutch assembly to the fan side of the flange that is secured to the water pump flange hidden under the water pump pulley bell.
In that instance you would use a chain or strap or other type water pump wrench around the water pump pulley bell. (As you would if doing this in your 1988 and the four 10mm hex hardware to separate the fan and clutch from the 1988 240 wasserpumpen, though much less force required of course on them four small sets of securing hardware.)
There exist a host of chain wrenches and other tools members here on this forum use. I mention a chain wrench as it works for me as counter hold. Other members will offer better suggestions, I hope.
I also had this same water pump fan on two 1979 240s (242 GT and 245 DL mustard or autumn colored yellow wagon).
You remove the two securing self-tapping metal screws that secure the water pump fan shroud to the radiator. You have to choreograph the left arm handling the (clockwise) counter hold on the water pump pulley bell and the other right arm to remove the center nut using a hex socket and ratchet or wrench (hex end). I found the center nut to be under some torque. A steady hand on the counter hold as you use a steady hand to remove the center nut.
One the nut is loose, you hold the weight of the fan / clutch assembly and unscrew the center nut.
With fan removed, you can remove the fan shroud.
It is a paradox as you can't remove the fan shroud without the water pump fan removed. You can't remove the water pump fan without removing the two top fan shroud screws and working around a loose fan shroud without marring the engine side of the radiator.
As Dave Volvo From Heck mentions, for more clearance, and avoid damaging the radiator, to drain the coolant and remove the radiator after freed shroud yet before removing the single fan / clutch assembly.
You repeat the exercise for four sets of 10mm.
You can upload any size image to BrickPix gallery so long as the image is under 1,024 kilobytes in file length, or 1 megabyte. Jarrod has not revised the BrickPix instructions yet. Tho your image is fine!
The 700-900 FAQ instructions for water pump change, the link is in a prior post in your thread mention inspection and test for resistance when pushing the fan blades when cold and with a hot radiator of the water pump fan viscous clutch. A nearly 40 year clutch may be worth of inspection or replacement.
You can install the same fan assembly as you have on your 1988 (or up to 1995 940) if you have a spare. Though inspect the junkyard pull or used for oil leaks or lack of resistance (fan spinning freely cold yet more so warm means failed).
When driving during warmer weather, as the engine heats to normal temp, you should hear the water pump fan roar under the hood. Though you won't usually here in in cold weather.
--
Give your brickboard.com a big thumbs up! Way up! - Roger Ebert.
|
|
-
|
|
|
Good point about using a more recent fan clutch assembly.
"You can install the same fan assembly as you have on your 1988 (or up to 1995 940) if you have a spare. Though inspect the junkyard pull or used for oil leaks or lack of resistance (fan spinning freely cold yet more so warm means failed)."
If you plan inspecting a junk yard fan clutch I would suggest 2 more things to watch for:
- look for minimum corrosion on the bi-metal coil. This coil is the thermostat that moves the center shaft and opens the channels that let the oil flow around the friction disk when high temperature is reached.
- take a small flat blade screw driver, slip it between coil as near the center as possible, force gently to turn the center shaft counter-clockwise. It should move about 20° and a good coil will bring back. If it does not move it means the center shaft is stucked in place with corrosion. If it moves and coil does not bring it back then the bi-metal coil is defective.
This fan clutch has a very sophisticated and at the same time simple mechanism inside.
Hope that helps.
Happy New Year Everybody.
|
|
-
|
|
|
"I notice that the fan has a large, central bolt instead of the 4 studs that connect the fan to the water pump as in the later model 240s."
That's unusual. Check your replacement water pump. Does it have a hole for the center bolt or does it have 4 studs?
"What I don't get is how to remove and correctly torque on reinstall the camshaft bolt."
Did you mean crankshaft? For the crankshaft, just remove the center bolt (7/8"?). I use Lucid's "rope trick" to hold the crankshaft in place. Slide off the gear and remove the semi-circular woodruff key (don't lose it).
--
1980 245 Canadian B21A with SU carb, M46 trans, 3:31 dif, in Brampton, Ont.
|
|
-
|
|
|
I used Lucid's rope trick. I managed to prevent the crankshaft from rotating backwards, but the bolt still will not come off. I used a propane torch on the bolt heat and a 2 foot breaker bar with a 3 foot cheater bar and the manual transmission in first gear. I also hit the breaker bar with a no-blow baby sledge hammer. Any suggestions?
On re-tightening, I wanted to double-check the correct torque for my 1980 242 DL with a stock B21F N/A engine. Bentley Manual on p. 216-9 (and only there) says that the correct torque for the crankhshaft bolt on the pulley hub to crankshaft is 165 Nm or 122 ft-lbs. Haynes is silent on the B21F crankshaft bolt torque.
|
|
-
|
|
|
I used Lucid's rope trick. I managed to prevent the crankshaft from rotating backwards, but the bolt still will not come off. I used a propane torch on the bolt heat and a 2 foot breaker bar with a 3 foot cheater bar and the manual transmission in first gear. I also hit the breaker bar with a no-blow baby sledge hammer. Any suggestions?
-> Use your ENTIRE body weight to pull with your hands holding the 3 foot cheater.
When you pull, the breaker & cheater bars combination SHOULD start to BEND, CREAK, feel SPRINGY and TENSE as if the whole thing gonna break but THIS is how it normally goes when undoing such STRONG bolt. The bars will fight against you but continue on pulling STRONG until the crank bolt start to creak and slowly turns anti-clockwise.
The crank bolt itself won't break, its very strong, but your bars and socket might be if you use regular steel variety. In this case get more heavy-duty tools - an impact variety carbonized hardened black steel socket with 3/4inch drive (for crank bolt), 3 foot breaker bar with 3/4inch drive and longer cheater bar.
Imagine you're like KING ARTHUR pulling the sword of EXCALIBUR from the stone : )
Amarin.
|
|
-
|
|
|
Hi,
I'm getting really surprised at California 240 and now you with having trouble breaking bolts loose.
California's issue is the camshaft bolt of which is only 35 ft. Lbs but yours is a bit more of course!
I can't get over this picture you are painting with words that you are using breaker bar with a cheater of three feet and that thing didn't crack loose.
This bolt could have been tightened up to 122 ft.lbs which will max out a beam bar torque wrench that's about the same length as your breaker bar but the cheate should get but you have to get everything tighten up with out play. Then, you flex your arms in to your body a little bit with your body leaning in.
Then you take your whole upper body and throw yourself back as hard as you can. That will get that large mass moving.
When your arms straighten out, you are to hang on with a grip of determination!
It's that mass of inertia and the "snap" of your arms that will smack that bolt through its "sweet spot."
The sweet spot that it was area of stressed or stretched up bolt body between the threaded portion and an area under the head. The twist has to be done suddenly to transfer energy down the center of the bolts body. You have to hit all of the molecules, in the structure, at the same time, to move them from resting. Internally you are overcoming their rest and the frictional bond of the threads.
Art asked me to explain the term inertia recently and I thought it wasn't needed, but you two guys have me rethinking the process of what's going on wrong here!
Newtons law states that " the mass will tend, or want to, stay at rest."
The simplest way I can say this, to anyone is, "one should think" about mass as "stored" stationary energy! It may look motionless but it is moving within itself but its atomic weight.
Everything on earth is an element!
It vibrating its own molecules around already due to forces of ambient heat transfer to within.
In theory, If absolute zero heat was obtainable, the elements would fall apart.
In 1984-5 I played with liquid nitrogen enough to see things shatter when another outside energy force called gravity or I struck them! Bananas and grapes can be like glass! (:-)
Seriously, I worked with a scientist from Vanderberg while he used our facility. He tried to use helium refrigeration in a descending cascade formation around chamber to reach an absolute zero in a vacuum. A few molecules of Heat was the last thing he could not get out!
This was when I first time I heard the term "Neutrinos" and his reason why he could not reach his goal! Since then they have proved they exist, twice! Once in a deep mine shaft in Minnesota, I think, and most recently at the South Pole!
Now they are plotting or trying to, get a direction from where since they pass through the earth.
Anyways, There is the "energy force of atomic attraction" inside that helps keep them together and happily intermingling together in a bond as a larger object we see!
Those molecules are busy being just where they are in the cosmos like everything else in a balance until acted upon by another force!
When you move a hammer or turn a wrench you are applying energy to redirect the accumulated atomic energy in an object in a chain reaction.
That force is defined as a focus of energy movement of a sum of masses or inertia transfer.
Once an object is moved it wants to keep moving in a direction until acted upon by another force. Whether it be air friction, the magnetic attraction of Gravity or any other manipulations of the cosmos.
Newton again!
So, This is all about the movement of energy with energy!
You should notice on a torque wrench a scale of a conversion table in Nm.
That is there to remind us, that his theory was accepted, as fact, long ago!
You and California 240 need to get "physical" with those levers, your body mass and your brain mass of electrical energy behind them.
May the force of a few beers or something, be with you!
Or a decent impact driver with electricity or air pressure is my recommendation!
(:-)
|
|
-

|
|
Hey Phil,
Normally, I don't post when I haven't a clue what's going on, but today I'm not feeling normal. This "central bolt" is in a fan clutch according to the original post in this thread. Have we moved on, to the crankshaft in this thread?
Reason I ask, is I know of very few left-hand threads in my Volvo experience, but one of them is a central bolt on a cooling fan, and I've never seen the fan clutch someone posted earlier belonging to a 1980 240. I've owned a '79 for nearly 20 years as second owner -- it has the same fan and clutch provided on all the 80's and 90's 240s where there's room to sneak in a 10mm wrench to remove four nuts.
The left-hand thread I'm thinking of is not something anyone would hang a breaker bar on. It attaches a plastic fan blade to an electric motor.

I think you have one of these in your '92 if I'm not mistaken. I know this isn't the fan the OP is fighting, but the principle might apply, given the fan in his picture is outside of my experience.
But as abnormal as I feel today, I'm reminded no one would use a rope trick to remove a fan bolt on a water pump, right?
--
Art Benstein near Baltimore
Sometimes I wake up grumpy; other times I let her sleep.
|
|
-
|
|
|
Hi Art!
I don’t think you are feeling “NOT normal.
It’s been going from camshafts, crankshafts, fan clutches and now electric fans with left hand threads. I didn’t know that about them at all!
It’s more like there is a lot more overtightened bolts or novices getting their hands on wrenches at both ends of the spectrum with these cars!
The internet can help fix lots of things but learning to know lefty loosie and righty tightly can only go so far!
Working up courage to yank or hit hard, takes practice, believe it or not?
When too and not too is getting refined like Shakespeare, of which, is to foreign for me,so consequently, I know what I leave alone! Maybe others are in the same gondola!
The lessons will continue on the Brickboard and under hoods!
Phil
|
|
-
|
|
|
Tools like this will work to hold the camshaft and IS pulleys so you can loosen and tighten the retaining bolts.
FYI, if you want to change the crankshaft seal, you are going to have to pull the large bolt so you can remove the gear to gain access.
Although the camshaft and IS round tooth pulleys may bolt right, you won't be able to use the crankshaft gear unless you make some modifications to either the end of the crankshaft or to the round tooth crankshaft pulley.
--
Eric
Hi Performance Automotive Service (formerly OVO or Old Volvos Only)
Torrance, CA 90502
hiperformanceautoservice.com or oldvolvosonly.com
|
|
-
|
|
|
Thanks.
I have a 1988 240 DL that uses the square tooth timing belt. If I get cam, intermediate, and cranshaft sprockets with rounded teeth, would I be able to use the rounded tooth timing belt wihout further modifications?
Thanks
|
|
-
|
|
|
You could use Gates Kevlar timing belt which they claimed to be 400% stronger than original. It should lasts longer. FCP Euro have them. Continue using those original pulleys.
https://www.fcpeuro.com/products/volvo-engine-timing-belt-940-740-760-780-242-244-245-240-745-racing#fitment
Amarin.
|
|
|
|
|
