|
|
|
Hi all,
1. When removing the tail shaft from the transmission, do I need to mark it in relation to the shaft housing just like the rear/drive shaft flange?
2. To press in new tail shaft bushing, what's the best homemade tool? PVC pipe with a cap?
3. Does the tail shaft bushing has a draft anlge like the rear trailing arm bushing? Is there a certain direction I need to press in/out?
4. When tapping a new center support bearing in place, using Art Benstein's method, Can this be done by one person? Or do I need a second person either hold the shaft or homemade press tool? Do I just hold the shaft and homemade press tool at the same time?
Thank you as always.
|
|
|
|
|
Hi all,
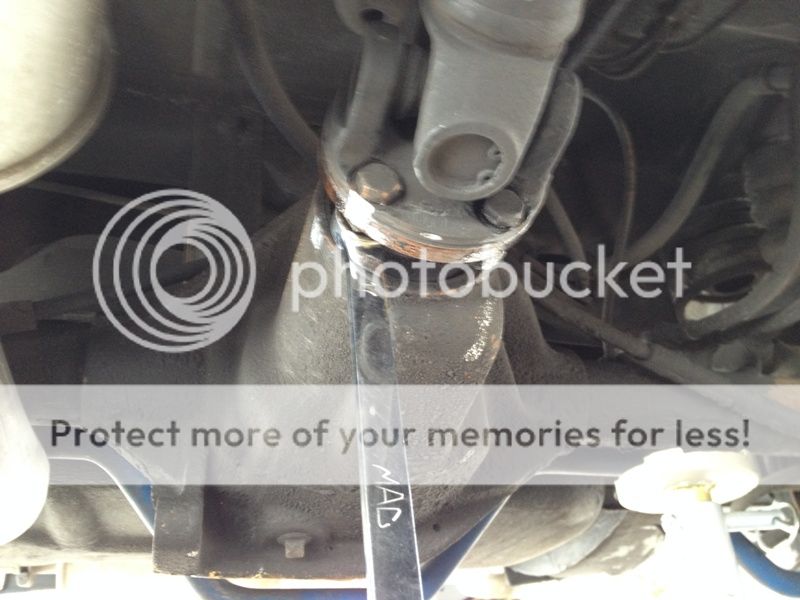
Over the weekend, I replaced my bad "suspected" center support bearing and fixed loose tail shaft bushing. I took some photos along the way and I wanted to share some of my experience. So here we go...
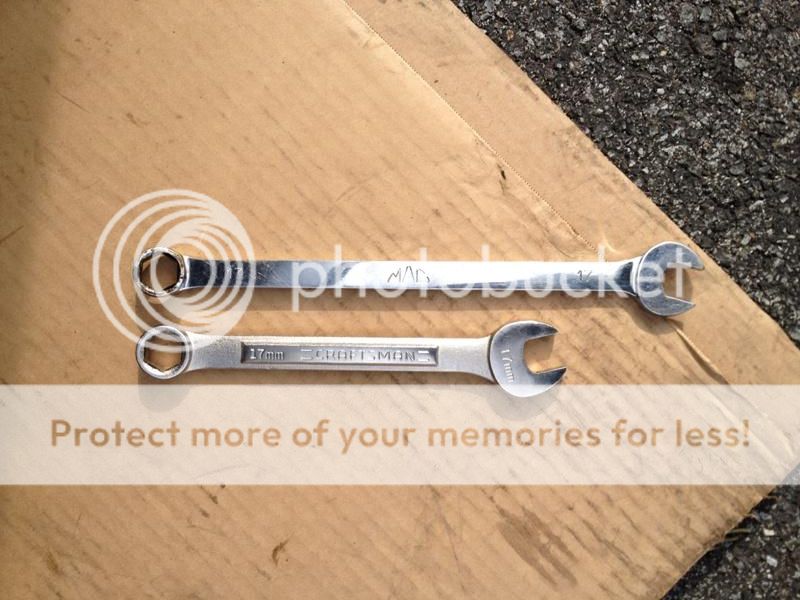
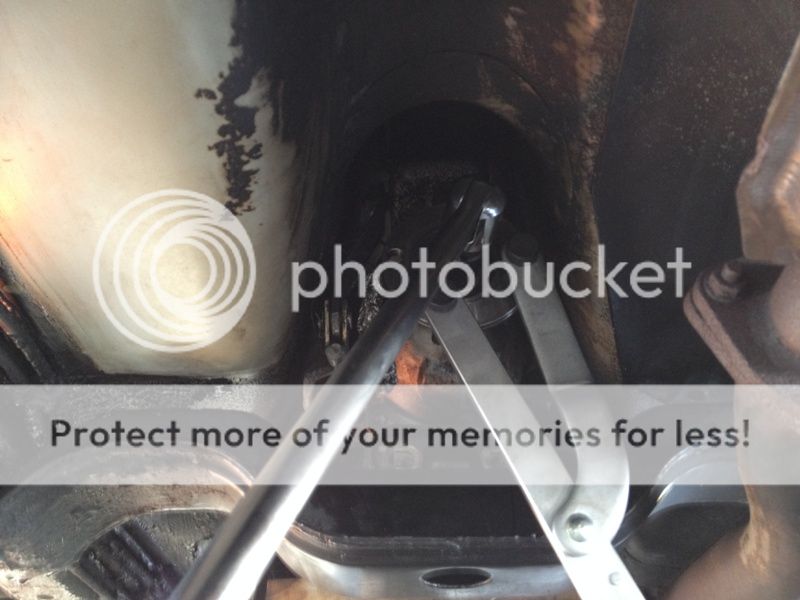
My first obstacle came to my attention when my newly acquired 15mm and 17mm Craftsman 6 point combo wrenches wouldn't fit and clear the tight spacing. In the beginning, I was so puzzled how on earth they put this together in the first place. I didn't even try to use a socket since it wouldn't fully seated. I was afraid that I will probably strip it. So there I was, scratching my head and trying to figure out what I was going to do. Then, I remember I did borrow a full set of my friend's Mac brand 6 point combo wrench sets and I thought maybe I should give a try. I ordered my own set two months ago but the Columbia Mall Sears lost track of my shipment and was in the middle of finding. As you see in the photo below, it just cleared very tight space in between the shaft flange and the differential housing/axle.
I saw and felt the huge difference between my friend's Mac set vs my $36 Craftsman set.
After all said and done, I realized I wasn't the only one attached this beautifully made tool. This nut didn't want to let go either. This little cute thingy. LOL.
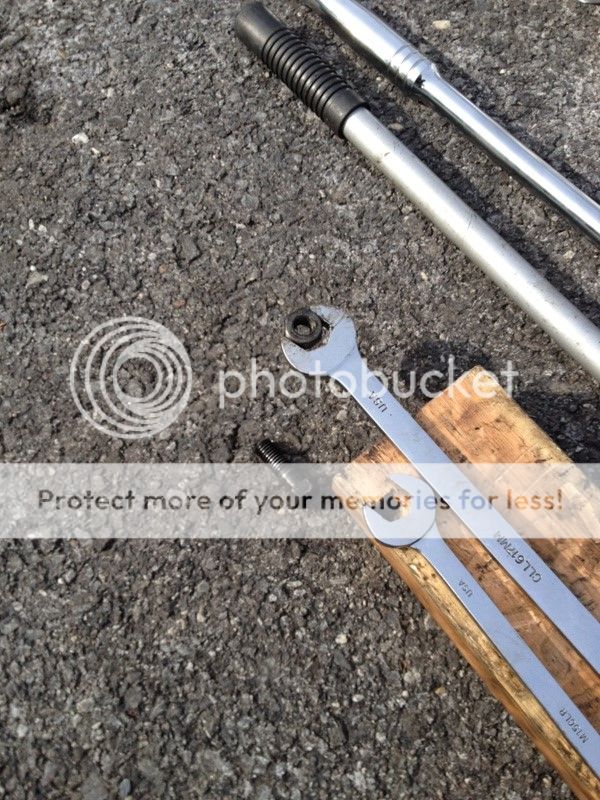
This particular stubborn bolt/nut decided to give me a hard time. My last resolution was to clamp it with a large lock channel pliers and wedged it against the underside carriage. BTW, my friend lost his 15mm/6 point wrench, that's 12 point so the pressure was on for me. It came out in the end but it gave me nasty road rash by my tail bone area and the upper shoulder blade area. Did I mention that I wore 4 layers of clothing and I was laying on top of a corrugated sheet?
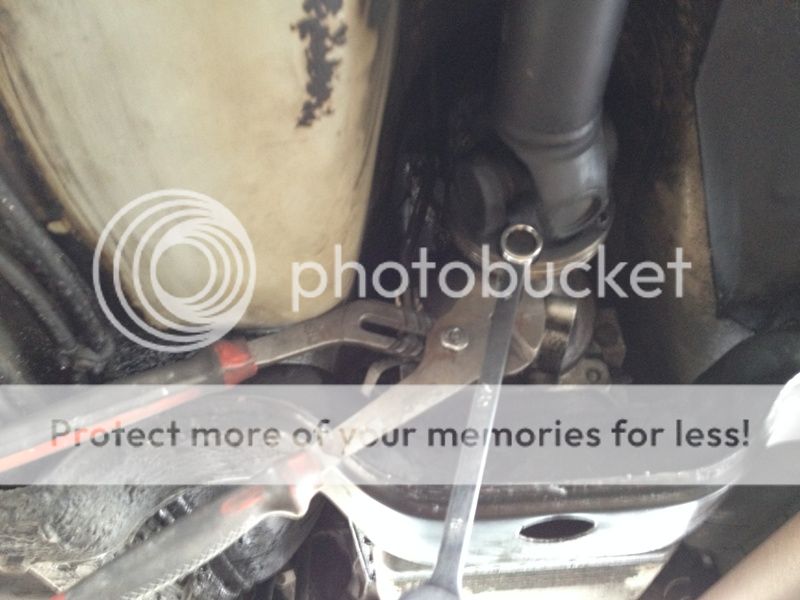
This is a photo of my first try to remove the bearing using a HFT 4" puller.
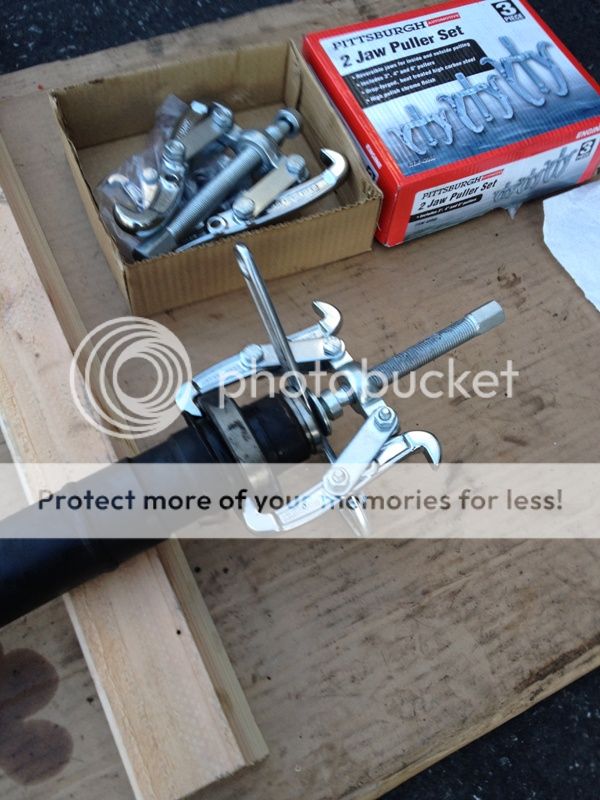
Failed...
Second try with smile on my face. I heard "crack", thought I busted the bearing assembly but it didn't. I was having a beautiful day.
Using my OTC counter holding tool. The tail shaft bolt was loose finger loose, put a new seal, applied blue Loctite on the thread and tightened back up. There is no more play. :D
Now that I am looking at these bolts/nuts on my desk. I am not sure if I should name them "The Three Stooges" or "The Good, the Bad and the Ugly". I am glad that it's done and over for now. :D
Hey guys, I really thank you all for helping me out here. I wouldn't come this far without you all! So thank you and thank you. Did I thank you enough? Thank you. :D
|
|
|
|
|
Hi Art,
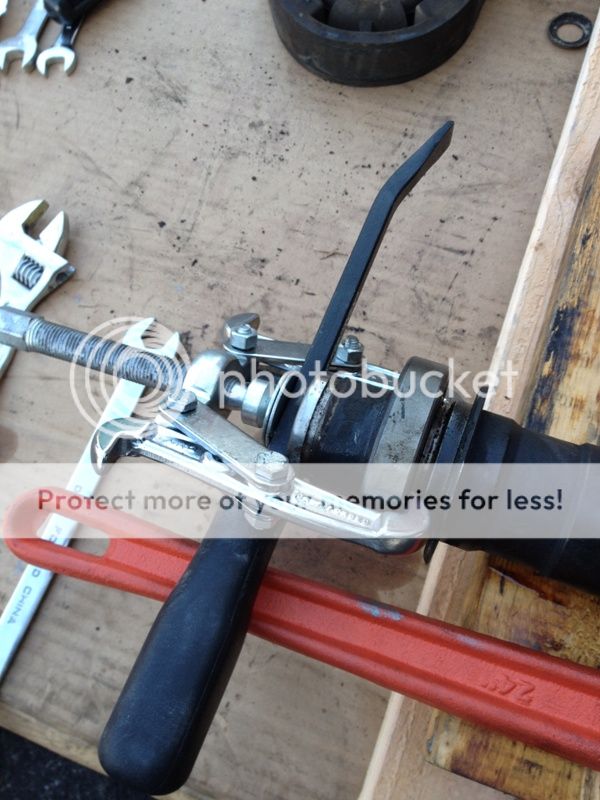
Of course, I followed your path. I could see why you chose a 2-arms instead of 3-arms pullers. Mine had a nice grip as you see from the photo, grabbed the inside metal ring from the start. I used my 24" steel plumber wrench as a counter hold tool. See the green arrow, that's where I put my foot down. I am glad that it brought back good memories. Thank you as always.

|
|
|
|
|
Hi Swedish Baklava,
Haven't been here on the BB for a while and I read through this thread. Glad to hear/see that your job went off without too big of a hitch.
How did you get the new bearing on? Tap it on with flat piece of steel or punch? I followed Tony's how-to on Art's site and did it that way.
This past spring when I did tail shaft bushing, seal and gasket I cut the bushing out of the tail shaft housing. Cut just about the entire way through then used a punch. Used a brass punch and a HF bearing race/seal installer set to put in the new bushing. Used the HF set on the seal also. The old gasket came off in two pieces-no scraping luckily!
A few more jobs on your 240s and with the saved $$$ you could pick up an inversion table!
Again, glad things went well.
Travis
|
|
|
|
|
Hi Travis,
Thank you for your kind words and reading my post.
I used a large PVC tube and tap it on for about 15-20 minutes. It took a long time but it was easier than what I anticipated. I didn't have to change the bushing, the shaft bolt was loose so that was good. You are lucky that your old gasket came off without scraping!
Inversion table?
I had a good laugh when I read your post and my wife thought I was crazy. So far I put around 88,000 miles in 3 years. I did spent my time and money more than I would like to. But it has been great learning experience for me, very valuable if I must say... Unless, I put another 100,000 miles on it. I am pretty sure that my wife wants hit me upside down. :-)
BTW, Great to hear from you. I was actually thinking about you and Uncle Udo II the other day.
Thank you as always.
|
|

|
|
I think of you every evening when I refill my water bottle. Now, next time I check the coolant rez...
--
Art Benstein near Baltimore
GREAT TRUTHS THAT LITTLE CHILDREN HAVE LEARNED:
5) You can't trust dogs to watch your food.
|
|
|
|
|
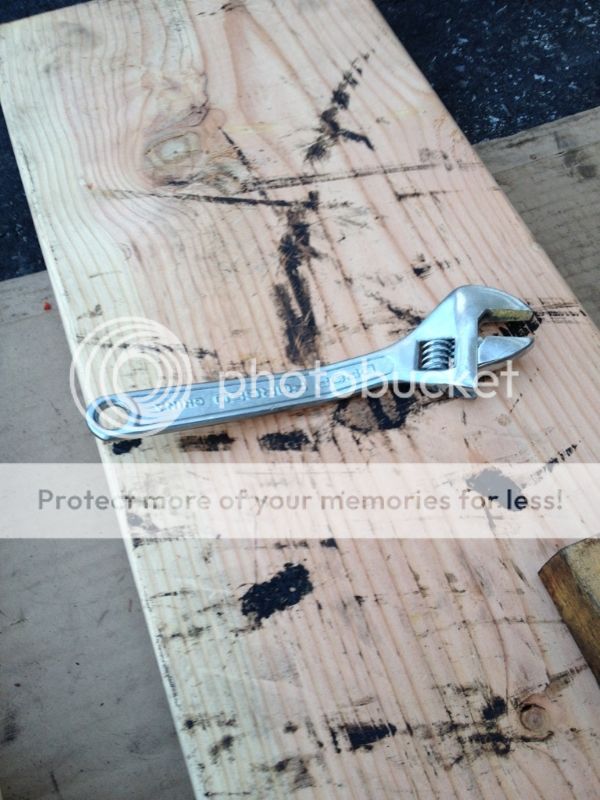
Good use of Pittsburgh tools! Love how the Chinese steel bends but does not break. A Craftsman wrench probably would have suffered a similar fate.
|
|
|
|
|
Hi Adirondack Blues,
What should I do with my bent wrench? It still works, sort of...
|
|
|
|
|
Hi all,
Thank you for all you help! My tail shaft bushing nut was finger loose. I will give you a full report soon.
|
|
|
|
|
Hi all,
Just a thought, I couldn't help myself but to find a cheap tool and modified it. How about this idea? Thank you as always.
Using a modifed HFT to remove the bushing without taking out the housing.
http://www.harborfreight.com/14-piece-gear-puller-set-30305.html
The red color indicated area needs to be milled by a milling machine. I have a friend who can do it for me.
|
|
|
|
|
Hi all,
My friend is going to help me to modify the HFT tool. By any chance, do you know this gap spacing (see red arrow)? If not, I will ask him to mill out as much he can. Thank you as always.
|
|
|
|
|
" What surprises me is I have not had to revisit this one or do any others among the 10 240's we've owned."
Hi Art,
I feel so lucky. LOL
Thank you for the pictures and your previous thread. It really helps me to focus and get ready for it.
I am leaning towards to making this tool because it really make sense to pull out the bushing since it's going to be really cold out.
If it's warm out, I wouldn't mind scraping gasket for half hour or so.
I might make a cheap greenhouse for my Swedish Baklava so that I can work a little longer and comfortably.
Still thinking... Changing the center support bearing seems a lot easier.
Thank you as always.
|
|
|
|
|
It must be leaking very badly for you to think of doing this work in today's weather much less plan actually doing it. I'd carry ATF and a sheet of cardboard before trying this with or without the slick tool on the street or driveway today.
Or even pay someone... well maybe I would not go that far.
One tactic you could take if your HF puller doesn't pan out: Pull the housing and cross your fingers the gasket will be as intact as mine was. Replace it with the old gasket and some of your favorite gasket sealer. It can't leak from the gasket any more than it did from the flange bobbing about in a worn bushing and ancient seal. Then if it does leak at all, save the scraping for July.
--
Art Benstein near Baltimore
You feel stuck with your debt if you can't budge it.
|
|
|
|
|
" Pull the housing and cross your fingers the gasket will be as intact as mine was. Replace it with the old gasket and some of your favorite gasket sealer. It can't leak from the gasket any more than it did from the flange bobbing about in a worn bushing and ancient seal. Then if it does leak at all, save the scraping for July."
Hi Art,
This is a great plan! I know things doesn't turn out the way we plan things but I like to be prepared to the certain degree.
The leak just started and doesn't look so bad. I don't think this is what caused the high pitch sound but the shaft play that feels too loose. Maybe the bolt that holding the tail flange/shaft is loose??? I will find out soon.
Thank you as always.
|
|
|
|
|
Hi SB,
Thought I'd kill the half hour I have 'til breakfast...
Looking at a post on TB about the carrier bearing, I realize one of your questions is left unanswered. I assume by referring to "my method" you are recalling a pic I've posted showing the bearing being tapped onto the driveshaft with a pipe nipple as a pusher.

No need for a second person. In fact there is very little I do for which I can engage a helper, beyond getting that photo of something that takes both hands. :)

Anyway, I thought of something else that may be helpful. Since no one reading BB has commented on the amount of steel you need to remove from Pittsburgh's Finest, I suggest taking that very nice drawing and posting it on TB. It suits the spirit on that forum's Maintenance and Non-Performance section even though there's no involvement of duct tape, JB Weld, coat hangers, or zip ties. Someone will have an AW-70 kicking around to measure across the splines or mic the thickness of the flange. I can provide the ID/OD of the bushing if needed, as I have a spare in my parts closet. I can almost picture someone there will offer to loan you the real tool.
Yup, 10 minutes and I can eat.
PS - yes, you can read in the pic that's a 1-1/2" pipe, but recall there are two size driveshafts, and that fits the smaller. Measure for yourself :)
--
Art Benstein near Baltimore
ACRONYM Abbreviated Coded Rendition Of Name Yielding Meaning
|
|
|
|
|
Hi Art,
You have a very good sense of humor.
Seriously, try that drinking room temperature water as I have mentioned for about three months.
Then one day, just do whatever you feel like it, eat or drink coffee without drinking water.
You will feel the sensation that your stomach doesn't like. You can judge for yourself...
Time to time, I do think of you and few other Brickboard members when I pump gas every other day.
While back, I decided never to run my car below 1/3 full and wanted to find out see if the main fuel pump can last long as my car.
It's really painful to bend over and pump gas, I think my back will go out first before the main fuel pump does. :D
Art, thank you. Have a beautiful weekend.
|
|
|
|
|
Swedish Baklava wrote--"It's really painful to bend over and pump gas, I think my back will go out first before the main fuel pump does. :D"
Here's a helpful hint from someone who's dealt with back issues for 40 years ---turn around and lean your back against the car while pumping - it's more comfortable - and it's more efficient - the spring loaded pump trigger is mostly moved by your middle and forefinger at a point that offers the least amount of leverage when you face the car -- turn your grip around and now those fingers are pushing against a longer lever - easier on your entire body. Of course this message may not be fully appreciated by folks who live in states that still allow the trigger locks. -- Dave
|
|
|
|
|
I think I'll give that a try when the salt season is over. My favorite fill up place just removed the locks recently which disturbs the efficiency of my under-hood checkout routine. I'm tempted to do what everyone else is doing - jamming the gas cap in the pump handle - but so far not given in. What kills my back is leaning over the engine for any length of time. I've come to understand that afflicts auto mechanics in general. Seems like exercise ought to help somehow.
--
Art Benstein near Baltimore
The sole purpose of a child’s middle name, is so he can tell when he’s really in trouble.
|
|
|
|
|
Hi Dave and Art,
I had very bad back not from fixing cars but I was able to get rid of it through swimming. I believe swimming really helped me to have a good posture. Also, building stronger core by doing the plank exercise will ease your pain.
http://www.leanitup.com/uberexercise-steamroll-pressure-test-your-core-with-the-plank-power-progression/
http://www.swimsmooth.com/
http://totalimmersion.net/

|
|
|
|
|
Art and SB, Absolutely, swimming is probably the very best form of exercise to aid the back. I woke up one morning at age 27 (now 66) and couldn't move. I've since kept myself regulated doing stretching exercises but never did take it to the next step of strengthening. Art, it is really the abdominal muscles that need building up. Muscles in the back being stronger than the abdomen and not enough flexibility is what leads to the pinched nerves in the back. Years ago a friend who slipped on ice was being treated by a doctor who had written a good book on the subject at the time. I've long since lost my copy (loaned out-never returned)--look for "Orthotherapy" by Dr. Arthur Michelle. It was a great help. -- Dave
|
|
|
|
|
As I recently discovered there are three sizes of bearings for the larger of two sizes of shafts. Required two 80 mile drives to VoluParts to resolve but they had all three sizes.
|
|
|
|
|
Wow, really? Part numbers?
I just posted on TB for someone's 88, and my fiche only shows the standardly available 183265 for all four versions of the driveshaft -- the 45x75x16 size bearing. Let me look up 87...
Edit: My fiche collection covers 79-84 and 88-93 :(
But VADIS lists every driveshaft for 87 with the 45x75x16 bearing I'm squinting at it right. Interesting...
Thanks Tom,
--
Art Benstein near Baltimore
My psychiatrist told me I was crazy and I said I want a second opinion. He said okay, you’re ugly too.
|
|
|
|
|
The answer might be that the drive shaft is not from a 240. VoluParts suggested the use of a later model 2" shaft for my V8 swap. I do not know if it was from a 700 or 900 series but there were, indeed, three different bearing on the counter at the same time all for the 2" shaft.
|
|
posted by
someone claiming to be CB
on
Thu Jan 23 16:06 CST 2014 [ RELATED]
|
|
"It must be leaking very badly for you to think of doing this work in today's weather much less plan actually doing it."""
Sorry Swede, but I've got to chime in here and agree with Art's commt
if the tranny fluid is not pouring out, so much that you have to stop and add a quart before and after your commute to work.
wait for Springtime....it's a Volvo... it will take some abuse. It's not an Audi.
by a gallon of ATF and wait until April
Cheers to you in NYC
|
|
|
|
|
Hi CB,
I don't know why. I know I am overly caring for this car, I only had for about three years. I will have less time to spend with my Swedish Baklava as the weather gets warmer. :-( I have listed few obstacle...
Half marathon race coming up in March.
Olympic distance triathlon race in May.
Half Ironman triathlon race coming up in Aug.
|
|
posted by
someone claiming to be CB
on
Thu Jan 23 16:33 CST 2014 [ RELATED]
|
|
some more regional pix for U.
http://www.nytimes.com/2014/01/20/nyregion/a-colossal-bridge-will-rise-across-the-hudson.html?
scroll down and watch the slide show
I attended the Zee Opening. my parents took me, I was 4 1/2 yo, the parade ah the parade.
|
|
|
|
|
Hi all,
Have anyone tried to convert/modify a tail pipe expander to pull out the tail shaft bushing? See Trichard's tool above. Thank you as always.
http://www.autozone.com/autozone/accessories/OEM-1-1-2-in-tail-pipe-expander/_/N-25fc?itemIdentifier=111039&_requestid=3166803
--
Please don't forget to drink a cup (prefer in glass not plastic or paper) of room temperature water every morning when you wake up. Drink another cup after half hour. Eat your breakfast half hour later. Then brush your teeth half hour later. Keep drink room temperature water until your urine becomes almost clear. Taper off on drinking water unless your urine color changes. Drink more if it does.
|
|
|
|
|
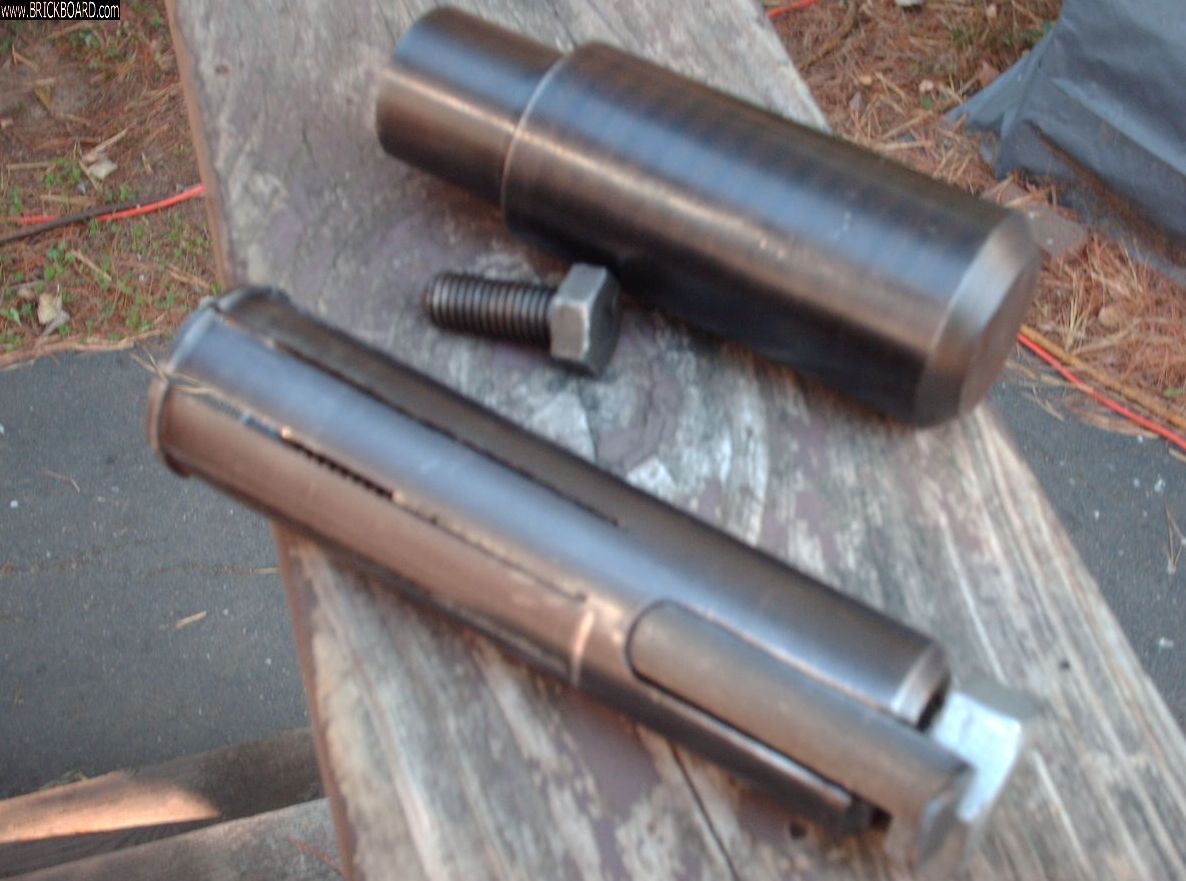
the tool i pictured i was able to buy from a volvo specialty shop in massachusetts that had 2 of them. these tools were never volvo dealer tools but were made by a parts company in nevada and "given" away free to all shops that purchased 25 or more gaskets and bushings per order from them for the tailshaft.
according to the parts man at this specialty shop this was in the 90's. these tool are no longer to my knowledge being made.
the tool that pulls out the bushing is very precise and brilliantly designed, made of high quality spring steel. i seriously doubt a homemade tool will work in its place short of someone being a good machinist with the right equipment to duplicate it.
to pull out the bushing requires an internal puller which will also slide over the back of the transmission out put shaft, then expand enough to grab the inner edge of the bushing all the way round evenly without scoring the housing as the bushing is pulled out. the tolerance to do this is so precise only the right tool will work.
|
|
|
|
|
Hi Trichard,
"very precise and brilliantly designed"
Yes, indeed. I can't agree more. I have a feeling that your tool might belong to a Volvo museum in the future someday along with the Brickboard conversation.
Happy Friday.
|
|
|
|
|
1. yes, note the hole in the bushing and replace it the same position to the housing
2. there is none short of owning the proper tool. since you will be removing the entire housing you can use a block wood to tap in the bushing on your bench.
3 no, the bushing is the same diameter all the way its length. note the hole in it, thats all
be aware with the right tool its a 2o minute job. without it you will spend several messy hours removing the housing and cleaning up whats left of the gasket off the back of the transmission. do not do that in a slipshod manner.
here is a pic of the proper tool/s

|
|
|
|
|
Hi Tirchard,
I have seen that picture before, I don't think I got it before and I do now. I just looked for that tool but I don't think I could get one. Or even try to make one close to that...
You are right about having a right tool really makes the difference. I have a rear trailing arm bushing removal tool and I really didn't have any problem pressing in/out the bushing.
I learned it hard way about "mating two surfaces" when I did my crank shaft plate cover. I am very concerned with the cold winter temperature that may effect on me while scraping the gasket. I will take my time and be patience.
Thank you for your great advice!
--
Please don't forget to drink a cup (prefer in glass not plastic or paper) of room temperature water every morning when you wake up. Drink another cup after half hour. Eat your breakfast half hour later. Then brush your teeth half hour later. Keep drink room temperature water until your urine becomes almost clear. Taper off on drinking water unless your urine color changes. Drink more if it does.
|
|
|
|
|


