Volvo RWD 200 Forum

INDEX FOR 10/2025(CURRENT) INDEX FOR 8/2002 200 INDEX

[<<]  [>>]


THREADED THREADED EXPANDED FLAT PRINT ALL
MESSAGES IN THIS THREAD


  REPLY TO THIS MESSAGE    PRINT   SAVE 

Anybody knows how to install a small rpm gage? 200

Hello everyone!
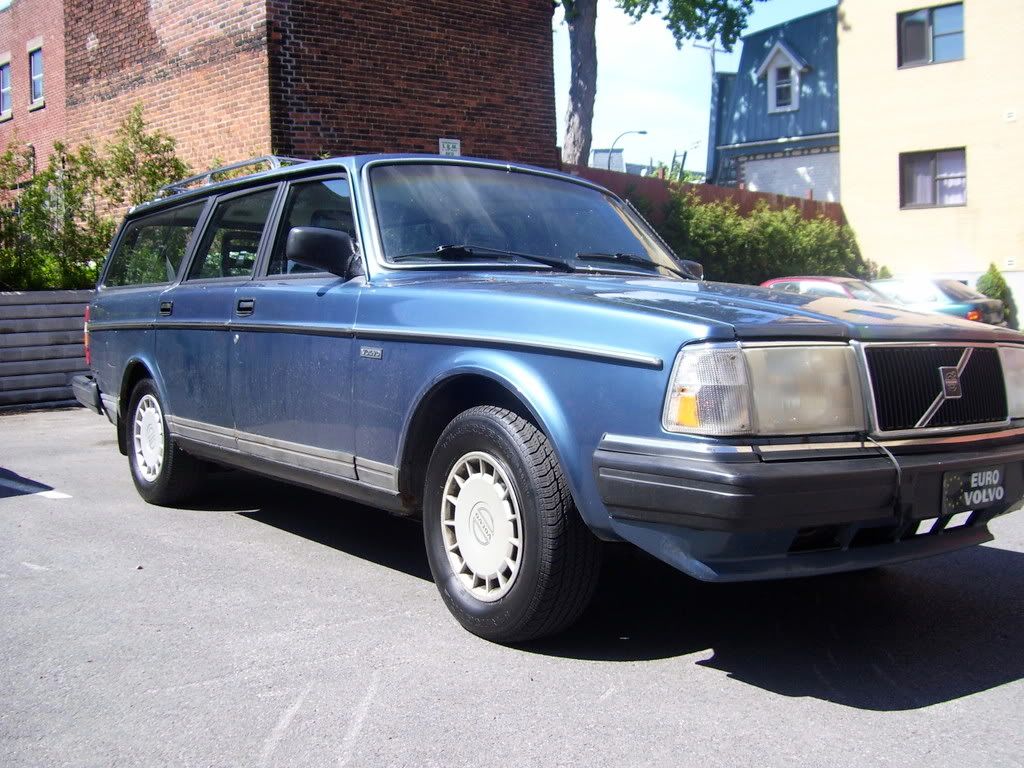
I just acquired a 1989 Volvo 245 DL to go with my thrustworthy 244... that also happens to be an 89 ;-)
I am already feeling the urge to improve the interior of the wagon but since I promised my wife not to spend a fortune on e-bay I'm going to try and use some of the parts I already have home....

Now I have a small rpm gauge, you know one that can go in the small pods on the side of the radio. It does not have any wiring attached to it....
Does anybody knows how to make the wiring or if it can be purchased somewhere?

Thanks


André


  •   REPLY TO THIS MESSAGE    PRINT   SAVE 

    I am lousy I know.... 200

    Ok... I don't really know how I did it.. or maybe I do but it's too long to explain but I mixed up the wires that go in the 3 pin plug in the back of the odometer/speedo and NOw it does not work anymore....
    DOes anybody know in wich order they're supposed to go?

    There is a blue one a black one and a red/black or dark gren one
    So far I was able to have the dash light up but no speed dial or odometer works
    I hope I didn't fry anything

    Thanks for your help


    •   REPLY TO THIS MESSAGE    PRINT   SAVE 

      I am lousy I know.... 200

      How you could do this is a mystery. But I guess the horse is out of the barn on that.

      Look at the plug and the back of the speedometer. In one location or the other the connections should be numbered 1, 2 & 3.

      Blue goes to #1. Black goes to #2. And, if you haven't already guessed, Red/Black goes to #3.
      --
      '80 DL 2 door, '89 DL Wagon


  •   REPLY TO THIS MESSAGE    PRINT   SAVE 

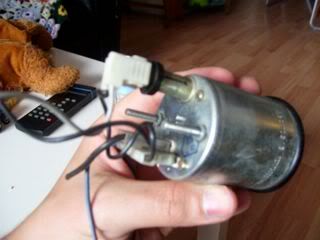
    Picture of the back of the gage... 200

    Actually there are more wires hanging back there than what I recalled :


    •   REPLY TO THIS MESSAGE Replies to this message will be emailed.    PRINT   SAVE 

      Picture of the back of the gage... 200

      The top two wires are for the light bulb. The one prong on the light going to the center of the base is the positive wire, feed off of your instrument lights in the center console. Ground the light wire with the negative wire of the tach. The tach should have the prong marked neg. on the back. The pos. prong on the lower half should be marked as well and take your power off of either the fuse panel directly or tap off of the fuel pump/system relay. The third prong is for the red/white tach wire I mentioned before.


  •   REPLY TO THIS MESSAGE Replies to this message will be emailed.    PRINT   SAVE 

    This is easy ... 200

    On the back of the tachometer, you'll see a small (roughly) triangular section with three spade terminals. The two along the edge are marked + and -, and these are obviously for the power to the tach. Slightly closer to the center of the housing, midway between the + and - terminals (think "triangle") is a third spade terminal marked G, which will be your input from the coil for your tach signal (more about this below).
    Of course, you'll also have your lamp for illumination -- this varies over the years -- the bulb holder may have both terminals, + and -, or just + with the case as the ground. For the +, just tap the ubiquitous brown wires that carry current to all the illumination bulbs behind the dash.

    As for the tach signal input, you have an '89, and sometime between '84 and '93 (the model years of my cars) Volvo added a tach input wire (white with red stripes) behind the main instrument cluster. If it's there, you can use that -- otherwise, you'll have to run a wire through the firewall/bulkhead from your coil to the tach.

    Of course, you'll also have to get the bezel, and you should get the three little rubber pieces that hold the tach (or any 2-1/16 inch gauge) in place in its hole in the dash.

    It's a lot easier than all this sounds if you're handy with wiring connectors, etc. The only hard part is if you have to run the wire from the coil to your tach.

    Good luck.

    Here's my '93's dash, by the way (with custom gauge faces):


    •   REPLY TO THIS MESSAGE Replies to this message will be emailed.    PRINT   SAVE 

      Tach wire is already there. 200

      There is a red/white wire hanging loose in the back of your dash. Check the previous postings about "Beware the red/white wire!" There is also a red/orange wire that people get confused when they re-install their instrument clusters. The red/orange wire powers the speedo. The red/white is for the tach. Just reach in and feed throught the back of the small bezel opening. It may be short and may be easier to add an extension wire.


    •   REPLY TO THIS MESSAGE    PRINT   SAVE 

      This is easy ... 200

      Ok it doesn't seem to hard... Hopefully the tach wire is already there... that will save some time ;-)


      Nice gauges you got! Pretty cool!


      •   REPLY TO THIS MESSAGE    PRINT   SAVE 

        This is easy ... 200

        If it's not there, although I think it probably is, you can simply tap the red/white wire that connects to 31b at the fuel pump relay. At it's other end this wire connects to terminal 1 on the coil so the result is the same.
        --
        '80 DL 2 door, '89 DL Wagon


<< < > >>


©Jarrod Stenberg 1997-2022. All material except where indicated.


All participants agree to these terms.

Brickboard.com is not affiliated with nor sponsored by AB Volvo, Volvo Car Corporation, Volvo Cars of North America, Inc. or Ford Motor Company. Brickboard.com is a Volvo owner/enthusiast site, similar to a club, and does not intend to pose as an official Volvo site. The official Volvo site can be found here.