|
|
|
What's the trick to removing 86-up 240 headlights? There are 3 push-in connectors secured by spring clips. You can install the lights by installing the clips and popping the assemblies into place.
Removal with the clips in place often breaks the plastic mount. Releasing the clips by pulling up allows removal of the headlight but it's challenging to reach in and find the clip. I thought the lights might be made to release with the clps in place but the old plastic won't take it.
|
|
|
|
|
stripping90 and Sven's Maintainer are correct. I just had to remove my frames (86 244)to clean/reglue the lenses, and the only fasteners that will allow you to remove the frames are the screws w/ 10mm nuts (which 2 on pass. side were rusted, cut w/ dremel). The Driver's side has 3, pass has 4. If you're messing with spring clips, I would think you're knocking the headlamp out of alignment- taking off the 10mm nuts will allow access w/o having to re-adjust later.
|
|
|
|
|
Thanks for the comments. I have to disagree about the clips.
I've had both sides of mine off and on since I started this thread. The clips just take patience. There's only one position when it's pushed in so it shouldn't change alignment.
Removing the frames is a chore and should only be required if you need to repair the frame itself.
--
240s: 2 drivers and some parts cars
|
|
|
|
|
I guess we'll have to agree to disagree; I prefer to take my 10mm wrench and spin the nuts off rather than having to fabricate special tools (although it does sound kinda fun). Knowing my automotive luck, I would end up breaking or losing something involving springs...
John
|
|
|
|
|
I have to both agree and disagree:
I agree with you that undoing the clips and removing the lens/reflector assembly that way won't affect the alignment PROVIDED that you don't turn the adjusting screws (which are what the clips hold the reflector onto) in the process. There are also some small springs and bushings in the sockets on the back of the reflector, which you must be careful not to lose.
Where I disagree is with the whole concept of removing the lens/reflector and leaving the frame attached to the car. It seems to be to be very difficult to get to the clips with the entire light assembly installed, and with such things it is always much easier to release the clips that to get them resecured correctly.
I recently had to remove both my headlights (89 244) and started a thread about the method I used for getting the rusted nuts off that did not involve cutting or drilling
|
|
|
|
|
Well, OK, maybe preference at work then. To me the clips are obviously designed to be a quick release for the headlights - which wear out. Vs the frame bolts: other than damage, why would the frames ever need to be removed?
But I didn't mean to get intense about it. I'll keep removing the clips and popping the lights out - which is cake now that I've made a couple of hooks and I will only remove the frame if I have to replace it or the signal lights.
I did see your thread on frame removal and (I think I) commented on it. It's a great method and when I do remove the frame from my 91 (broken signal) I will yuse your technique.
--
240s: 2 drivers and some parts cars
|
|
posted by
someone claiming to be stripping90
on
Sun Mar 30 02:13 CST 2008 [ RELATED]
|
|
lampsandlenses .com has a pretty sweet deal on 240 headlight parts
|
|
|
|
|
Thanks. Hmmmmmmmmm, they sell the lens separate from the assembly. I thought the lens was factory-sealed to the assembly - I'm thrown some out because they've separated.
|
|
|
|
|
Thanks for the comments Sven & Stripping90. But perhaps I misstated the problem:
I want to remove just the headlights. These are secured by 3 push-in connectors. It is the plastic socket that these go into which I've broken on removal.
You're talking about the plastic/ fiber assemblies that hold the lights We used to call these headlight buckets or headlight cups on older cars. The sockets that I'm breaking are on these units.
I know the bolts you mean: the plastic is in a hex mold around the head; they turn in the plastic when rusted; when you clamp the area with a vice grip you destroy it.
Thing is, you can't get to the head of these bolts until you remove the lenses.
Unless you're suggesting that I remove the whole assembly from behind the grill support to get to the push-in clips. That's a bad idea IMO because the headlight cover unit is designed to be removed separate from the bucket/ cup assembly.
My method now is to reach in with wire and release the spring clips. That's much easier that removing the assembly. In fact, the only reasons to remove the backing assembly would be if it were damaged or to replace the turn/ parking assembly.
Perhaps my method is OK then. it just takes some fiddling with a bent wire to release the clips.
|
|

|
|
"You're talking about the plastic/ fiber assemblies that hold the lights We used to call these headlight buckets or headlight cups on older cars. The sockets that I'm breaking are on these units."
Volvo calls those units "Frames", and apparently didn't consider the rust effect on those embedded mounting in bolts and nuts. I'd say you've encountered a 240 maintenance "rite of passage".
1312620-6 FRAME, LEFT $76.15 MSRP $51.67 Internet price at Tasca Volvo.
1312624-4 FRAME, RIGHT (same price)
I've only done it with the Lamp unit laying flat (lens down) on a padded surface,
with the frame fitted from above and pressed down while twisting the clips into place.
At least that's how I remember — it's been a while.
--
Bruce Young
'93 940-NA (current), 240s (one V8), 140s, 122s, since '63.
|
|
|
|
|
OK, thanks, headlight frames. That's a good term.
I've only removed them for spares before junking a car but now I need to remove one to replace the signal/ parking assembly - I think this has to be removed from the back of the frame w/ the frame off.
It's an expectation issue really: I thought headlights would be trivial job and didn't want to allocate any time to it. Now I see it's more serious and in that light my technique is OK: remove the grill and only one of the clips is difficult to reach. I made a hook out of some spring wire and it's easy enough to pull them up. Then the headlight pops right out. Reinstall the clips, dab of grease in the socket, cake to put them back.
For the frames I'll use Sven's technique and cut the bolts off. Although I think I'll try to drill from the front 1st - his Dremel method requires several discs.
Rite of passage: to me the only real 240 service RoP is the blower motor. I removed 3 from cars last summer before I scrapped them. Still challenging, even though you can be destructive to dash, wires, etc as the car is going away.
So far I've refused to R & R one. I sold 2 240s last year w/ bad heater blowers: in both cases I included a good spare motor and explained that it was an all-day job. A bit like Ikea and various toys: "much assembly required".
When I broke the CPS bracket on my 91 last month I pulled the trans without complaint. But I can't bring myself to spend 4-6-8 hours on an irritating interior job. And the newer cars are fine for me without the blower motor anyway. Oh, you can't defrost idling in the yard but they keep up with frost and fog when driving.
|
|
|
|
|
The best way to service headlights is indeed to remove the entire unit from the car. However as the man said, the 10mm nuts and studs are usually corroded. If the nut sticks, you will spin the head of the bolt in the plastic base plate.
All is not lost. With the proper tool, you can indeed remove the reflector assembly from the front. The trick is to rotate the spring clips halfway off the plastic tower they are on. Combination of working from the side and working through openings in core support, etc. As you've noticed, one side of each tower has a slot in it. The clip is held in place in that slot by the pressure created on the reflector adjuster post/ball assembly from a spring in the tower behind the post. Push the reflector in slightly on the tower you are working on. Grasp the pin with a long needle nose pliers or use a screwdriver to push the side not in the tower slot up and over the top of the tower. You can try and release the clips too, if the correct side is facing up, but not easy. Once one side of the clip is free from the tower, you can usually wiggle that post out. Some of the towers have the white plastic dowel in them, some have springs. Watch what parts come out of where. In putting it all back together, grease all the parts, do it when it's warm, put the clips completely in place over the towers and work the adjuster posts into the towers gently until they snap in.
|
|
|
|
|
Thanks for the comments.
The best way to service headlights is indeed to remove the entire unit from the car.
I can't agree really: The quick-release clips are there for a reason and I have to believe that Volvo didn't mean for us to remove the frames every time we wanted to change headlights - the frames should only be damaged by a serious accident; the lights/ lenses are vulnerable to flying rocks, small close encounters, and age cracking.
I like your two techniques: 1) turning the spring clips; and 2) pushing in on the lens while lifting the clip. Obvious now that you say it but I hadn't thought it through.
I did use grease on reinstall and that was easy. It was just getting them out that proved a challenge. In part because I thought they'd just pop right out with some force.
|
|
|
|
|
I'm with you. Let me temper my comments: The best way to service the lights is to remove the whole unit...as long as the nuts and bolts are clean and rust free! Then it's a five minute process to just remove the whole thing. That's definitely quicker than fishing around for the clips, but the truth is that the nuts are almost always frozen. I've found that with practice, getting the clips loose isn't that tough and I agree, Volvo wouldn't have designed them that way if they weren't there for us to use. These days I take a quick look at the nuts behind the core support. If they are anything but clean and rust-free, I just pull the clips. I bought a very long-nosed, very skinny needle nose pliers at a garage sale last year which makes it easier.
DS
|
|
|
|
|
OK, thanks. Sure, I see what you're doing. I gave up looking at the nuts because I've yet to find any that don't strip out. So I have the extra-long needlenose pliers and a little hook I made.
|
|
posted by
someone claiming to be stripping90
on
Sat Mar 29 03:10 CST 2008 [ RELATED]
|
|
Back up and address completely different fasteners.What you are looking for is three or four threaded steel shafts with nuts that require a 10mm socket,cleaning the threads with lube such as wd-40 or PBblaster is recommended.good luck
|
|
|
|
stripping90 is right - you need to find those threaded screws with the 10 mm. hex nuts. One headlight has four, approximately at the four corners. The other one has only three; I think it's the driver's side. Other stuff is in the way so only three screws on that side.
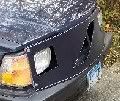
I've removed several late 240 headlights in the course of my own headlight project (see small photo).
Here in the Northeast rust belt, most of those nuts are frozen to the studs and PB Blaster does not help enough because the studs are not very well anchored in the plastic headlight assembly. I doubt heat would work; it would just melt the plastic as the stud will carry the heat right to it.
I was able to cut off the nuts with a Dremel type tool. Each one will probably take at least 10 minutes so recognize that going in. Use a good light so you can see. Use FIBER REINFORCED cutoff wheels. The regular cutoff wheels won't last long enough; you'd go through dozens of them and not be finished yet. A simple AC powered version of the Dremel is fine; you can get that plus a 5-pack of cutoff wheels for $40-$50 if you don't have one yet. I never thought I'd want one of those but now that I have one it's become a favorite for all kinds of small cutting and trim work on metal, plastic, wood. Brought a dead steak knife back to life too, quickly.
Once the headlight is off you see where the head of that cut off stud is anchored in the plastic. Really they're screws with hex heads on the back end. Replace them with new ones from a hardware store; it's a standard metric size. I recommend stainless. Maybe 40 cents each instead of a dime, big deal. Even if you spun the screw in the plastic the new one will anchor fine and will hold when you tighten the nuts - mine all did. Just use new screws with clean hex heads. Old rusted heads = rounded corners = slip too easily.
I think the 3 push-in connectors secured by spring clips that you found are the aiming adjustments. Two of the three have thumb grips, the other is just an anchoring point; three points determine a plane.
Beware: At the base of those adjusting studs with spring clips is a small spacer bushing. I think not all studs but some. If you remove any studs from the holes you need to catch those bushings and note which hole they came out of. Any missing or switched bushings will result in headlights that tip and rock back and forth as they will not be secure on the studs. Wanna guess how I learned that?
Good luck!
If you want to remove headlights at a junkyard you'll need a good battery powered Dremel. I never tried one so I don't know if they have the beef to cut the steel.
--
Sven: '89 245 NA, 951 ECU, expanded air dam, forward belly pan reaches oem belly pan, airbox heater upgraded, E-fan, 205/65-15 at 50 psi, IPD sways, no a/c-p/s belt, E-Codes, amber front corner reflectors, aero front face, quad horns, tach, small clock.
|
|
|
|
|
The best attachment is the 90 deg Dremel head or the flexi shaft. Saves time and finger flesh!
The hell with PB or WD 40...
AEROKROIL is the only way to go.
|
|
|
|
|
